SERVERware 3 Mirror to Cluster Edition Upgrade
To update SERVERware 3 from Mirror to Cluster edition following procedure should be used.
First, log in to your SERVERware 3 GUI, go to "MAIN MENU ---> HOSTS" and then in the bottom section switch to Network interfaces. Here we can see the list of our network interfaces and we have a free network interface to create a SAN network (adding the SAN network should be done manually).

In this picture, we can see there is an unused network interface named "enp0s20f1". We will use this interface for our SAN network.
Now go to the terminal and using ssh login to the primary or secondary server and run "netsetup" utility.

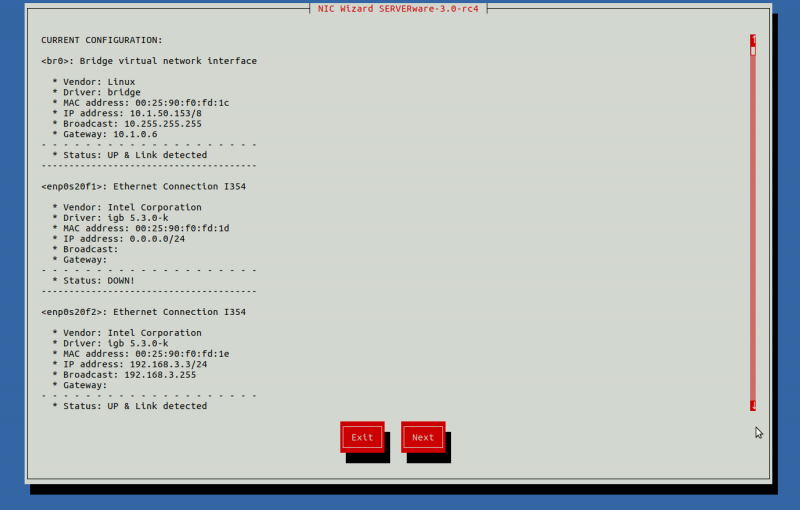
On the first screen press next.

Select the type of configuration you will be using and press next.
We will use the existing network interface. In the case that you need to bond 2 or more interfaces, you can pick 'Create virtual bonding network interface' option.

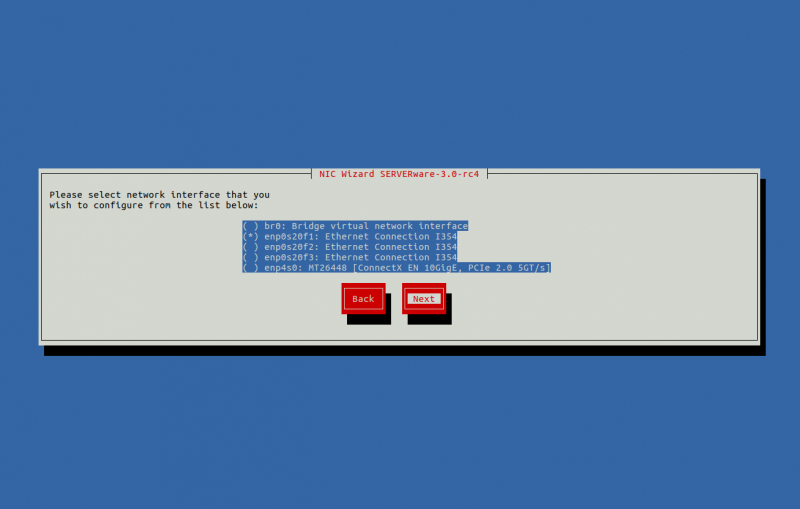
On this screen select the network interface named "enp0s20f1" and press next.

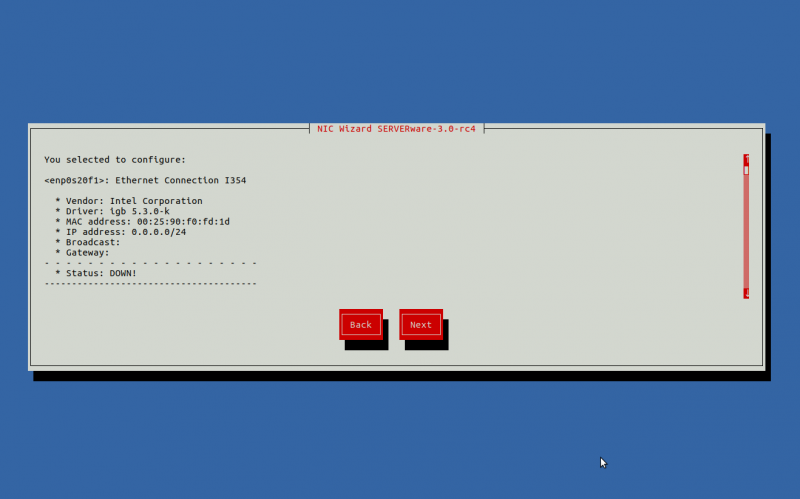
Confirm and press next.

On this screen, we will select "specify an IP address manually" and press next.

Next, enter address parameters as required (detailed information on SAN network addressing can be found in the installation of cluster edition Wiki page)
In our case we will use the following configuration:
Storage Server-primary: 192.168.2.2
Storage Server-secondary: 192.168.2.1
Floating SAN address: 192.168.2.3

Press Finish to confirm.
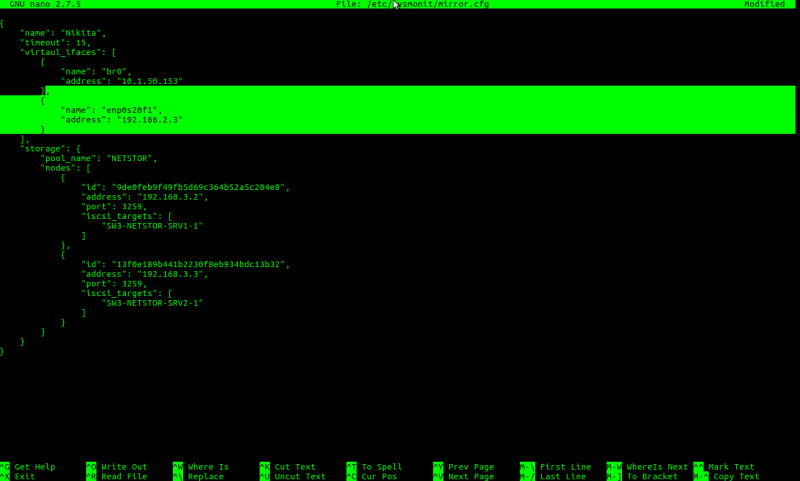
Now on the same server, we need to edit mirror.cfg file.
To edit, type in the terminal:
#: nano /etc/sysmonit/mirror.cfg

Add lines highlighted with green colour in the same place after brackets.
,
    {
            "name": "enp0s20f1",
            "address": "192.168.2.3"
        }
Save the file and log out from the first server.
Now we need to repeat all of the above steps on the second server
After these steps are done on both storage servers, ssh to the primary server and export virtual SAN address with this command:
#: ifconfig enp0s20f1:VIRT 192.168.2.3
And restart sw-connector
#: /etc/init.d/sw-connector restart
We now have a few modifications in the SERVERware 3 GUI.
Now login to GUI and go to the MAIN MENU ---> Settings ---> Networking and add another network subnet as described in the next image:

Press add to save the network.
Now go to MAIN MENU ---> Settings ---> Storage and inside "iSCSI IP Address:" field, enter your virtual address as described below:

The last step is to update the Licence. Go to the "system settings", press the update licence button, enter your licence for cluster edition and press Apply.

The upgrade procedure is now complete.
