1. MS Dynamics Setup
The following document explains how to integrate MS Dynamics CRM with PBXware.
It covers the configuration on both the PBXware side and within the MS Dynamics CRM system, including required
permissions, user accounts, and API connections.
Step-by-step instructions, screenshots, and troubleshooting guidelines are provided to ensure a smooth integration process.

Figure 1: MS Dynamics CRM Setup Example
1.1 Prerequisites
• Microsoft Dynamics 365 (online) account with a user assigned the administrator role within the Microsoft Office 365 subscription.
• An active Azure subscription — required to register the application in Azure Active Directory.
1.2 Authentication Steps Using Azure Applications
To connect to Dynamics 365 through Azure, you need to:
1. Create and configure an application in Azure Active Directory.
2. Create a user in Azure AD and configure it as an application user within Dynamics
365 CRM.
3. Generate an Access Token and use it in calls to the Dynamics 365 Web API.
1.3 Setting Up an App in Azure — Detailed Steps
1. Navigate to the Azure portal and select Create an Azure Account.
• Note: If you already have an active Azure account, you can skip this step
and proceed directly to logging into your existing account.
2. Log in to the newly created Azure account.

Figure 2: Logging into Azure Account
3. Go to Microsoft Entra ID → Manage → App registrations → New registrations.

Figure 3: Microsoft Entra ID Dashboard

Figure 4: Manage App Registrations
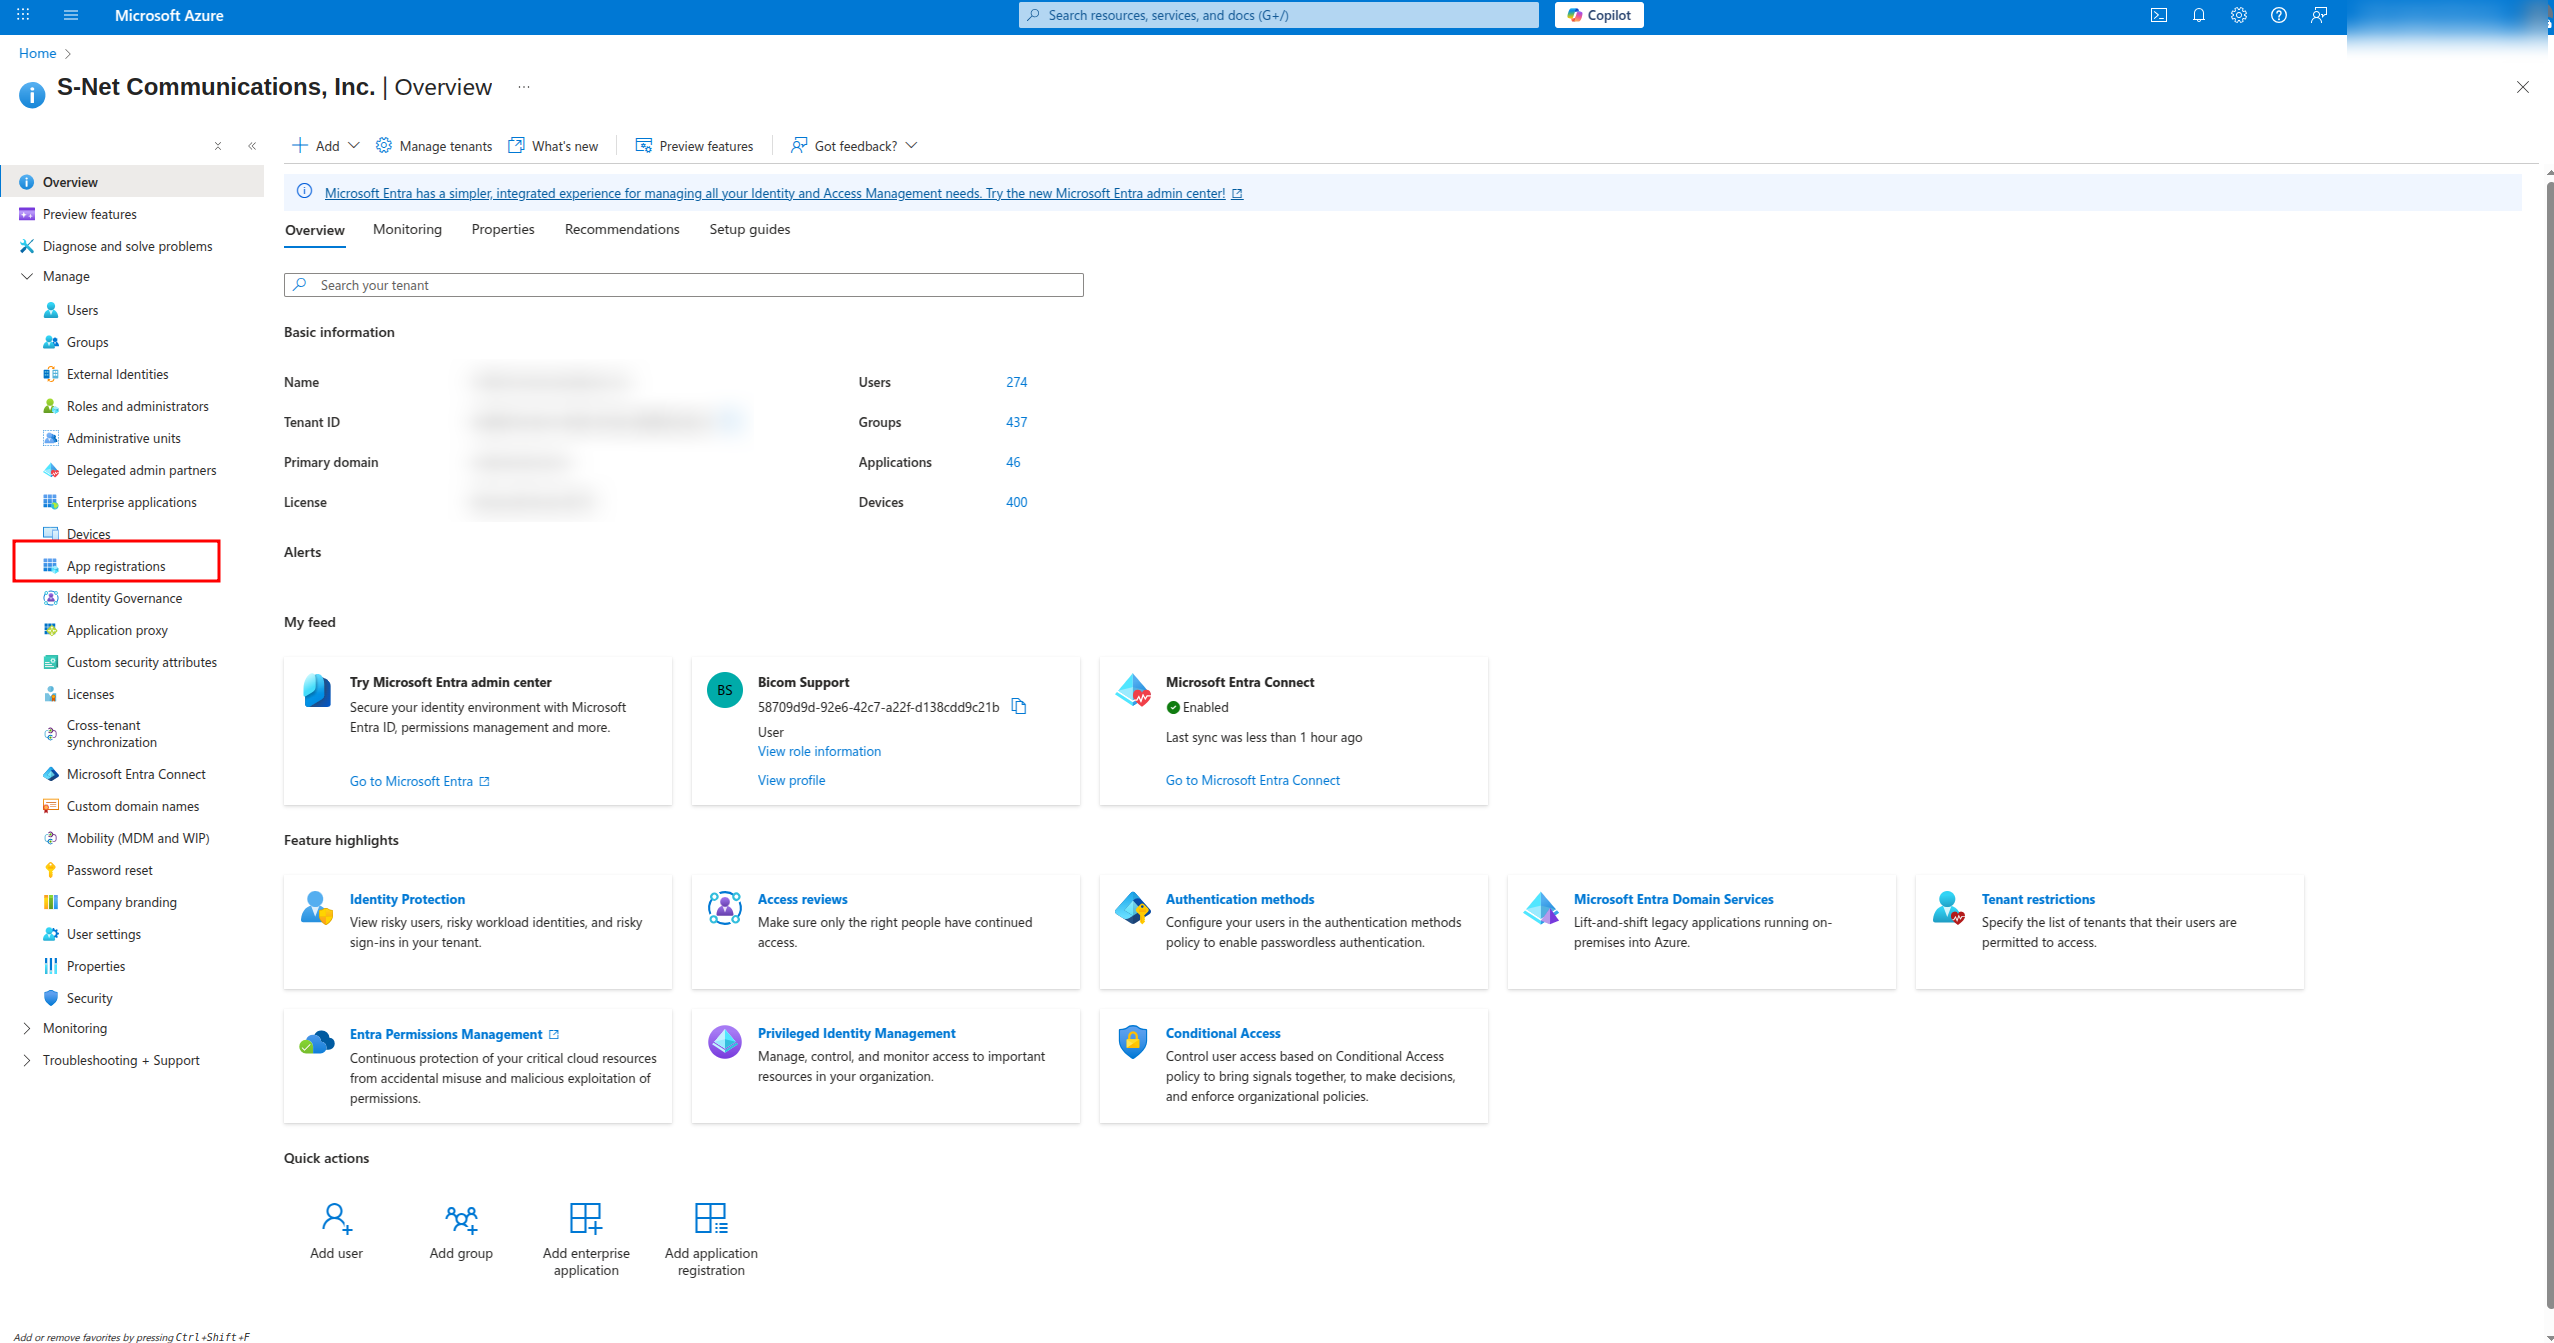

Figure 6: New App Registration Step 2
4. Fill in the required fields and click Register.
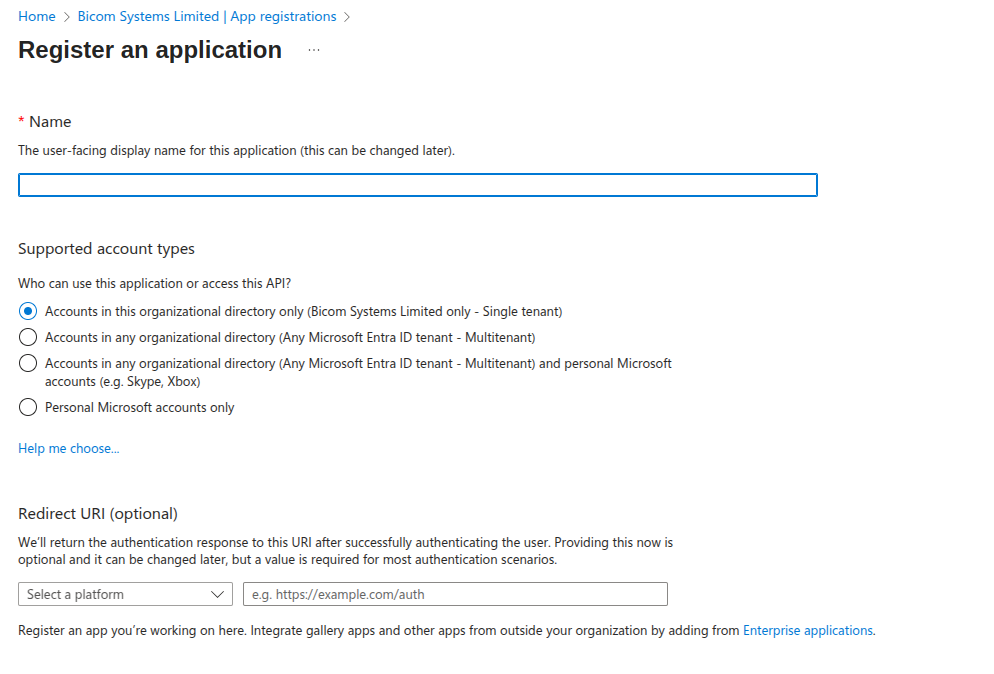 Figure 7: Filling in App Registration Fields
5. Once the application is created, copy the values for Application (client) ID and Directory (tenant) ID.
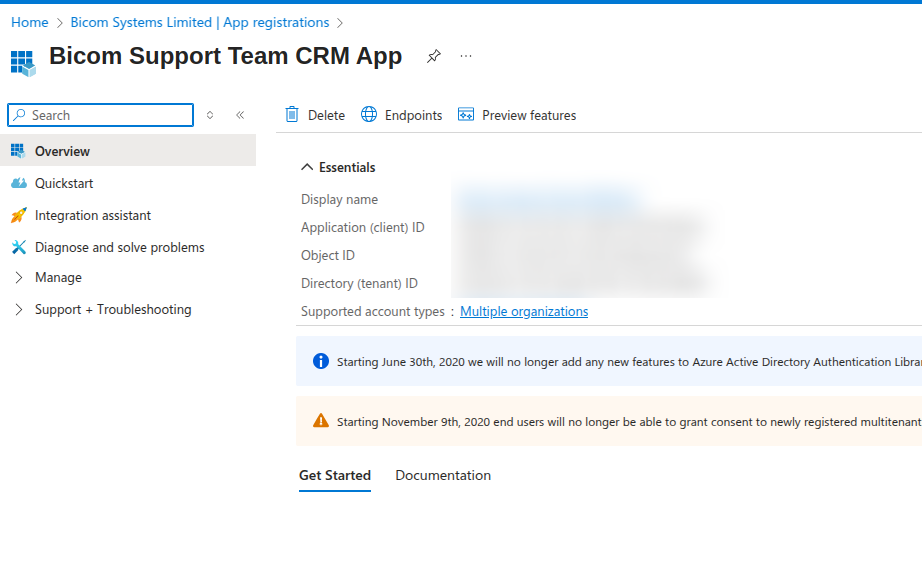 Figure 8: Copying Application and Tenant IDs
6. In the application settings, add permissions for accessing Dynamics CRM: View API Permissions → Add a permission → Dynamics CRM, select the
appropriate delegated permissions, and click “Grant permissions”.
![]()
Figure 9: API Permissions Step 1
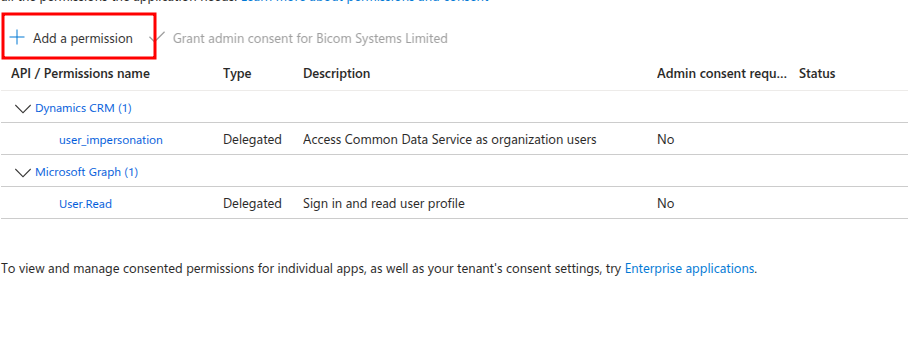
Figure 10: API Permissions Step 2

Figure 11: API Permissions Step 3

Figure 12: API Permissions Step 4
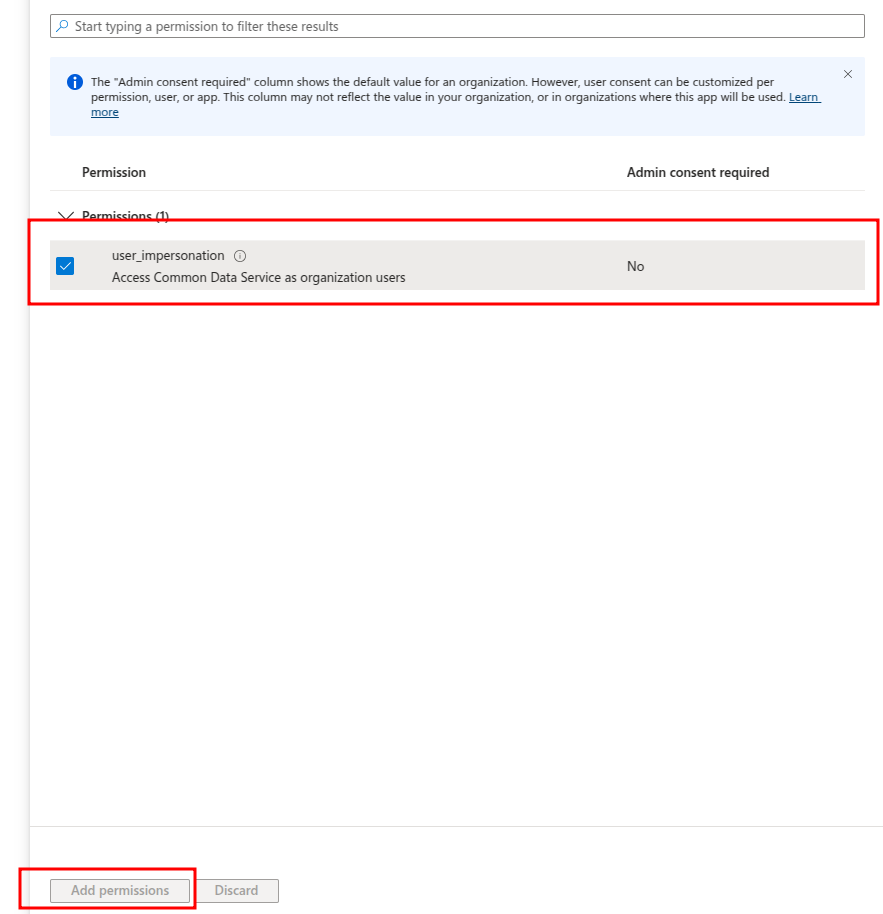
Figure 13: API Permissions Step 5
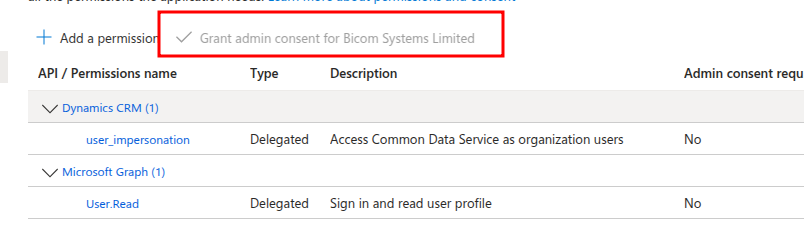
Figure 14: API Permissions Step 6
7. Create a client secret: Certificates & secrets → New client secret. Enter a
description, set an expiration, click Add, and save the secret value.
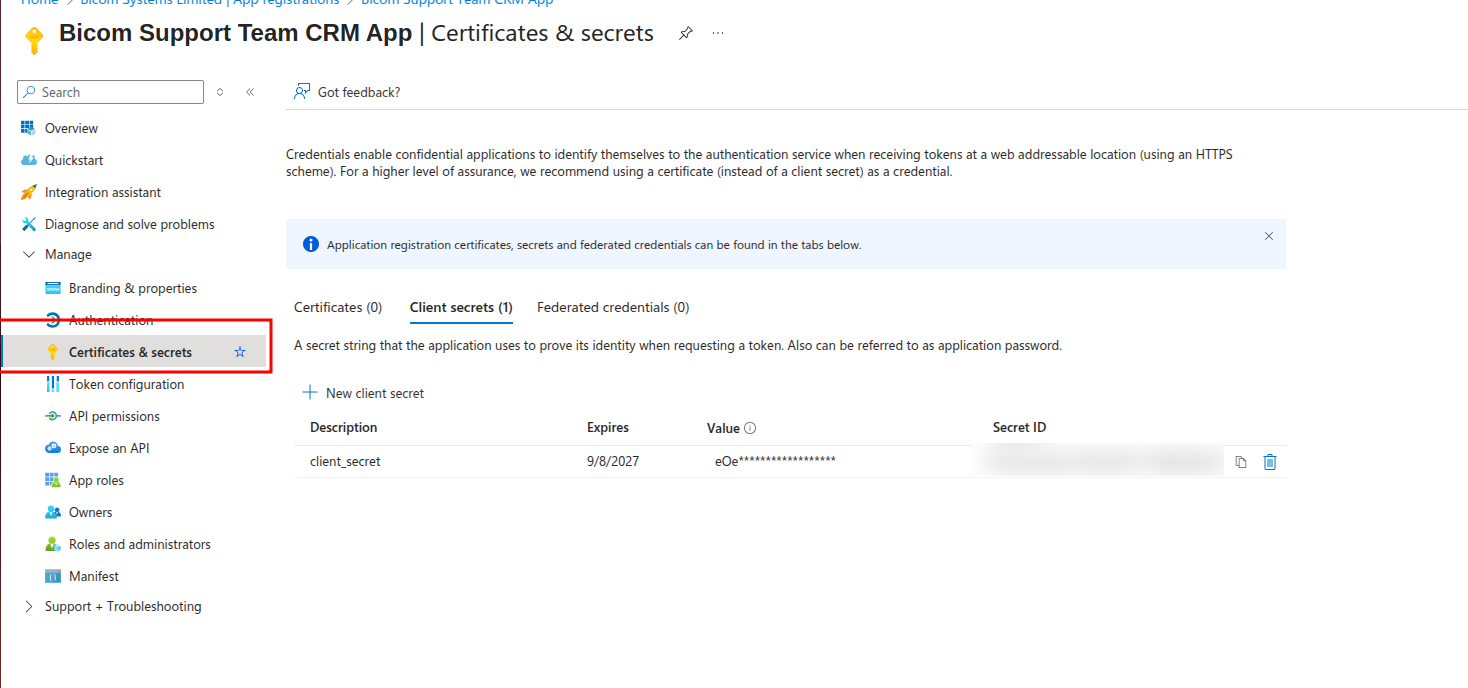
Figure 15: Creating Client Secret Step 1

Figure 16: Creating Client Secret Step 2

Figure 17: Creating Client Secret Step 3
1.4 Create the Application User
1. Navigate to https://admin.powerplatform.microsoft.com/ → Environments → Settings → Users + permissions → Application Users → New app user.
• Each Dynamics 365 organization automatically has at least one default Environment created.
• If you see multiple environments listed, select the one associated with your Dynamics 365 instance.
• Click on the desired environment name to open it — this action will display the Settings section.
2. Once inside the environment, go to: Settings → Users + permissions → Application Users → New app user.

Figure 18: Adding an Application User
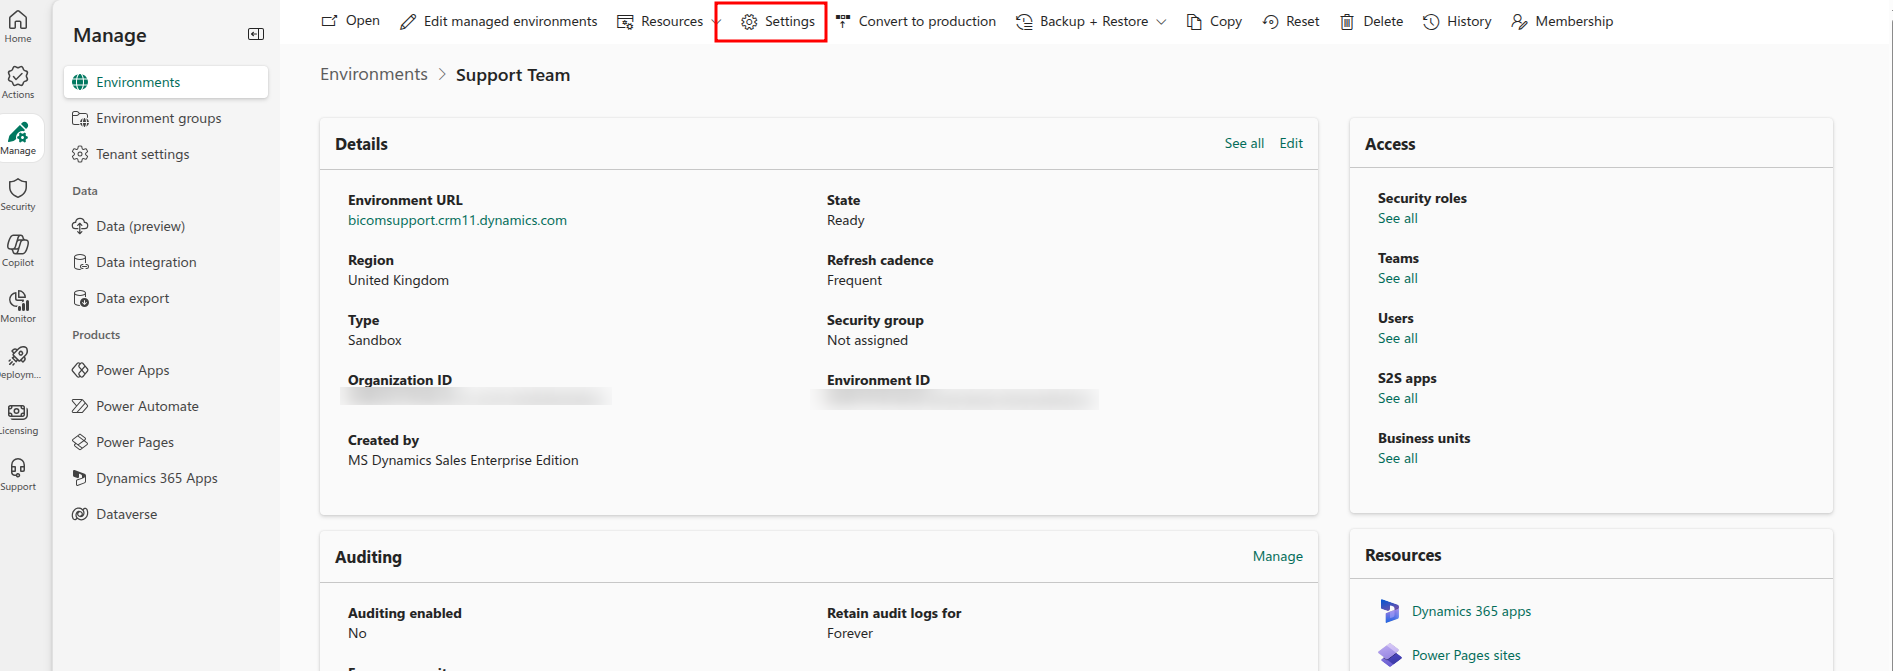
Figure 19: Adding an Application User
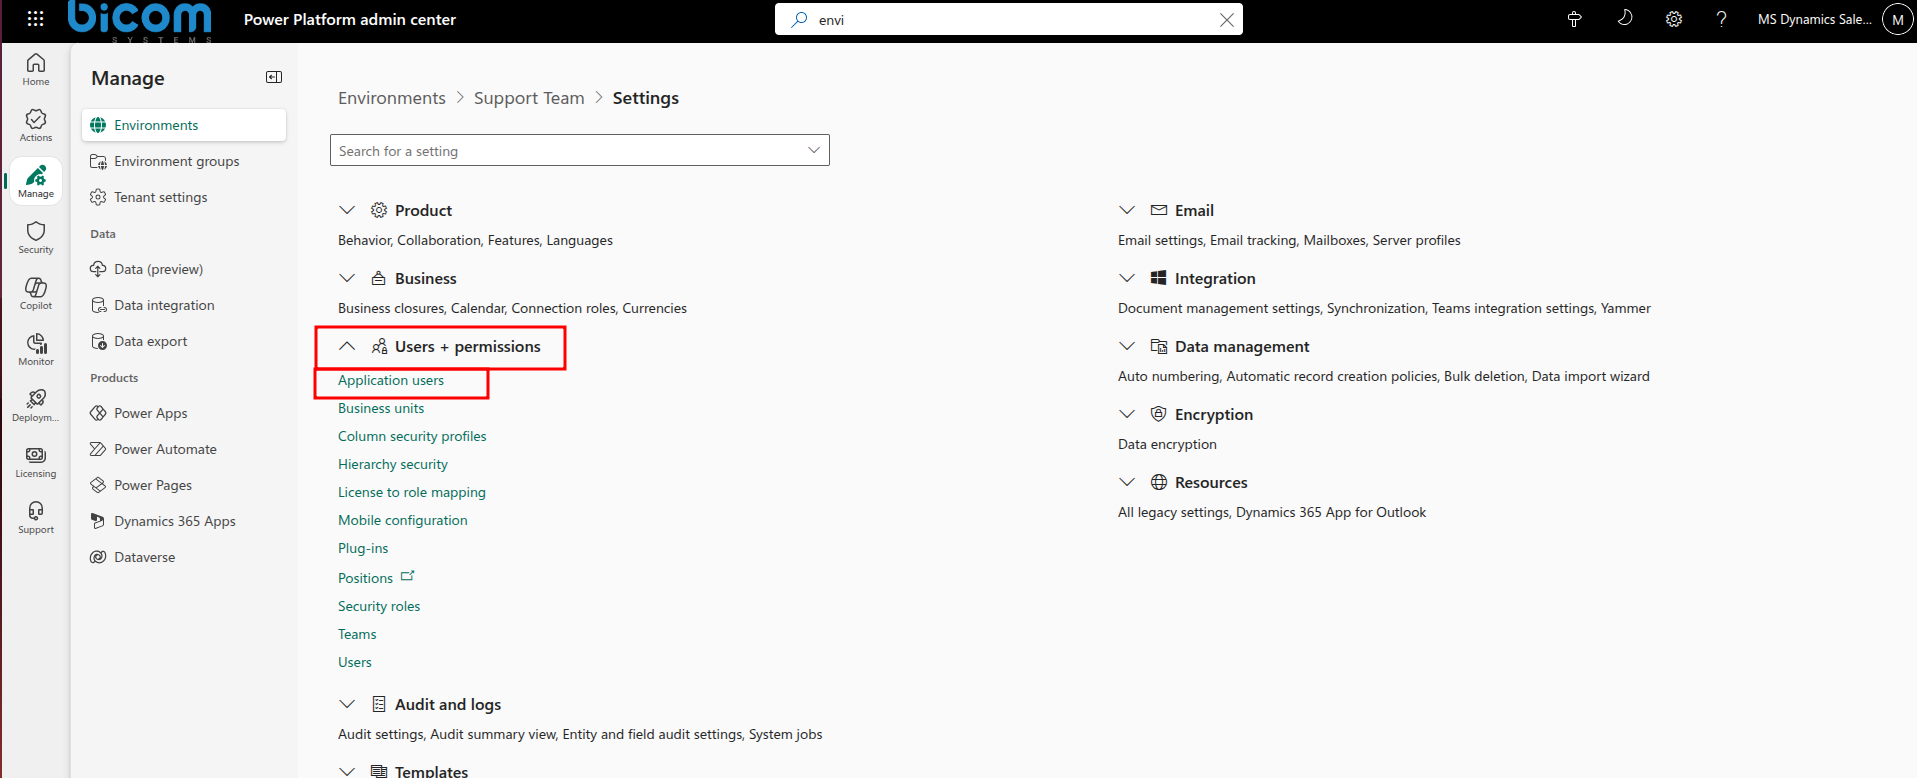
Figure 20: Adding an Application User
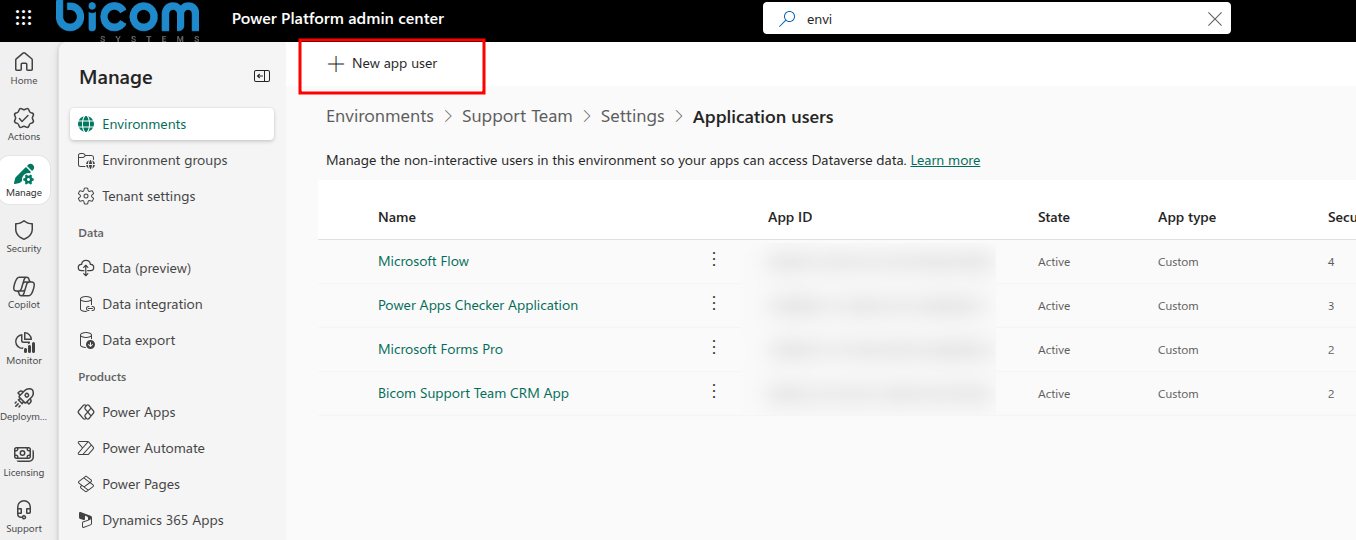
Figure 21: Adding an Application User

Figure 22: Adding an Application User
2. CRM Integration Configuration
This section explains the configuration parameters required for the integration between
PBXware and Microsoft Dynamics CRM
2.1 Integration Parameters
• API Version: V2
• Page URL: your crm url
Example: https://orgxxxxxxxx.crm4.dynamics.com
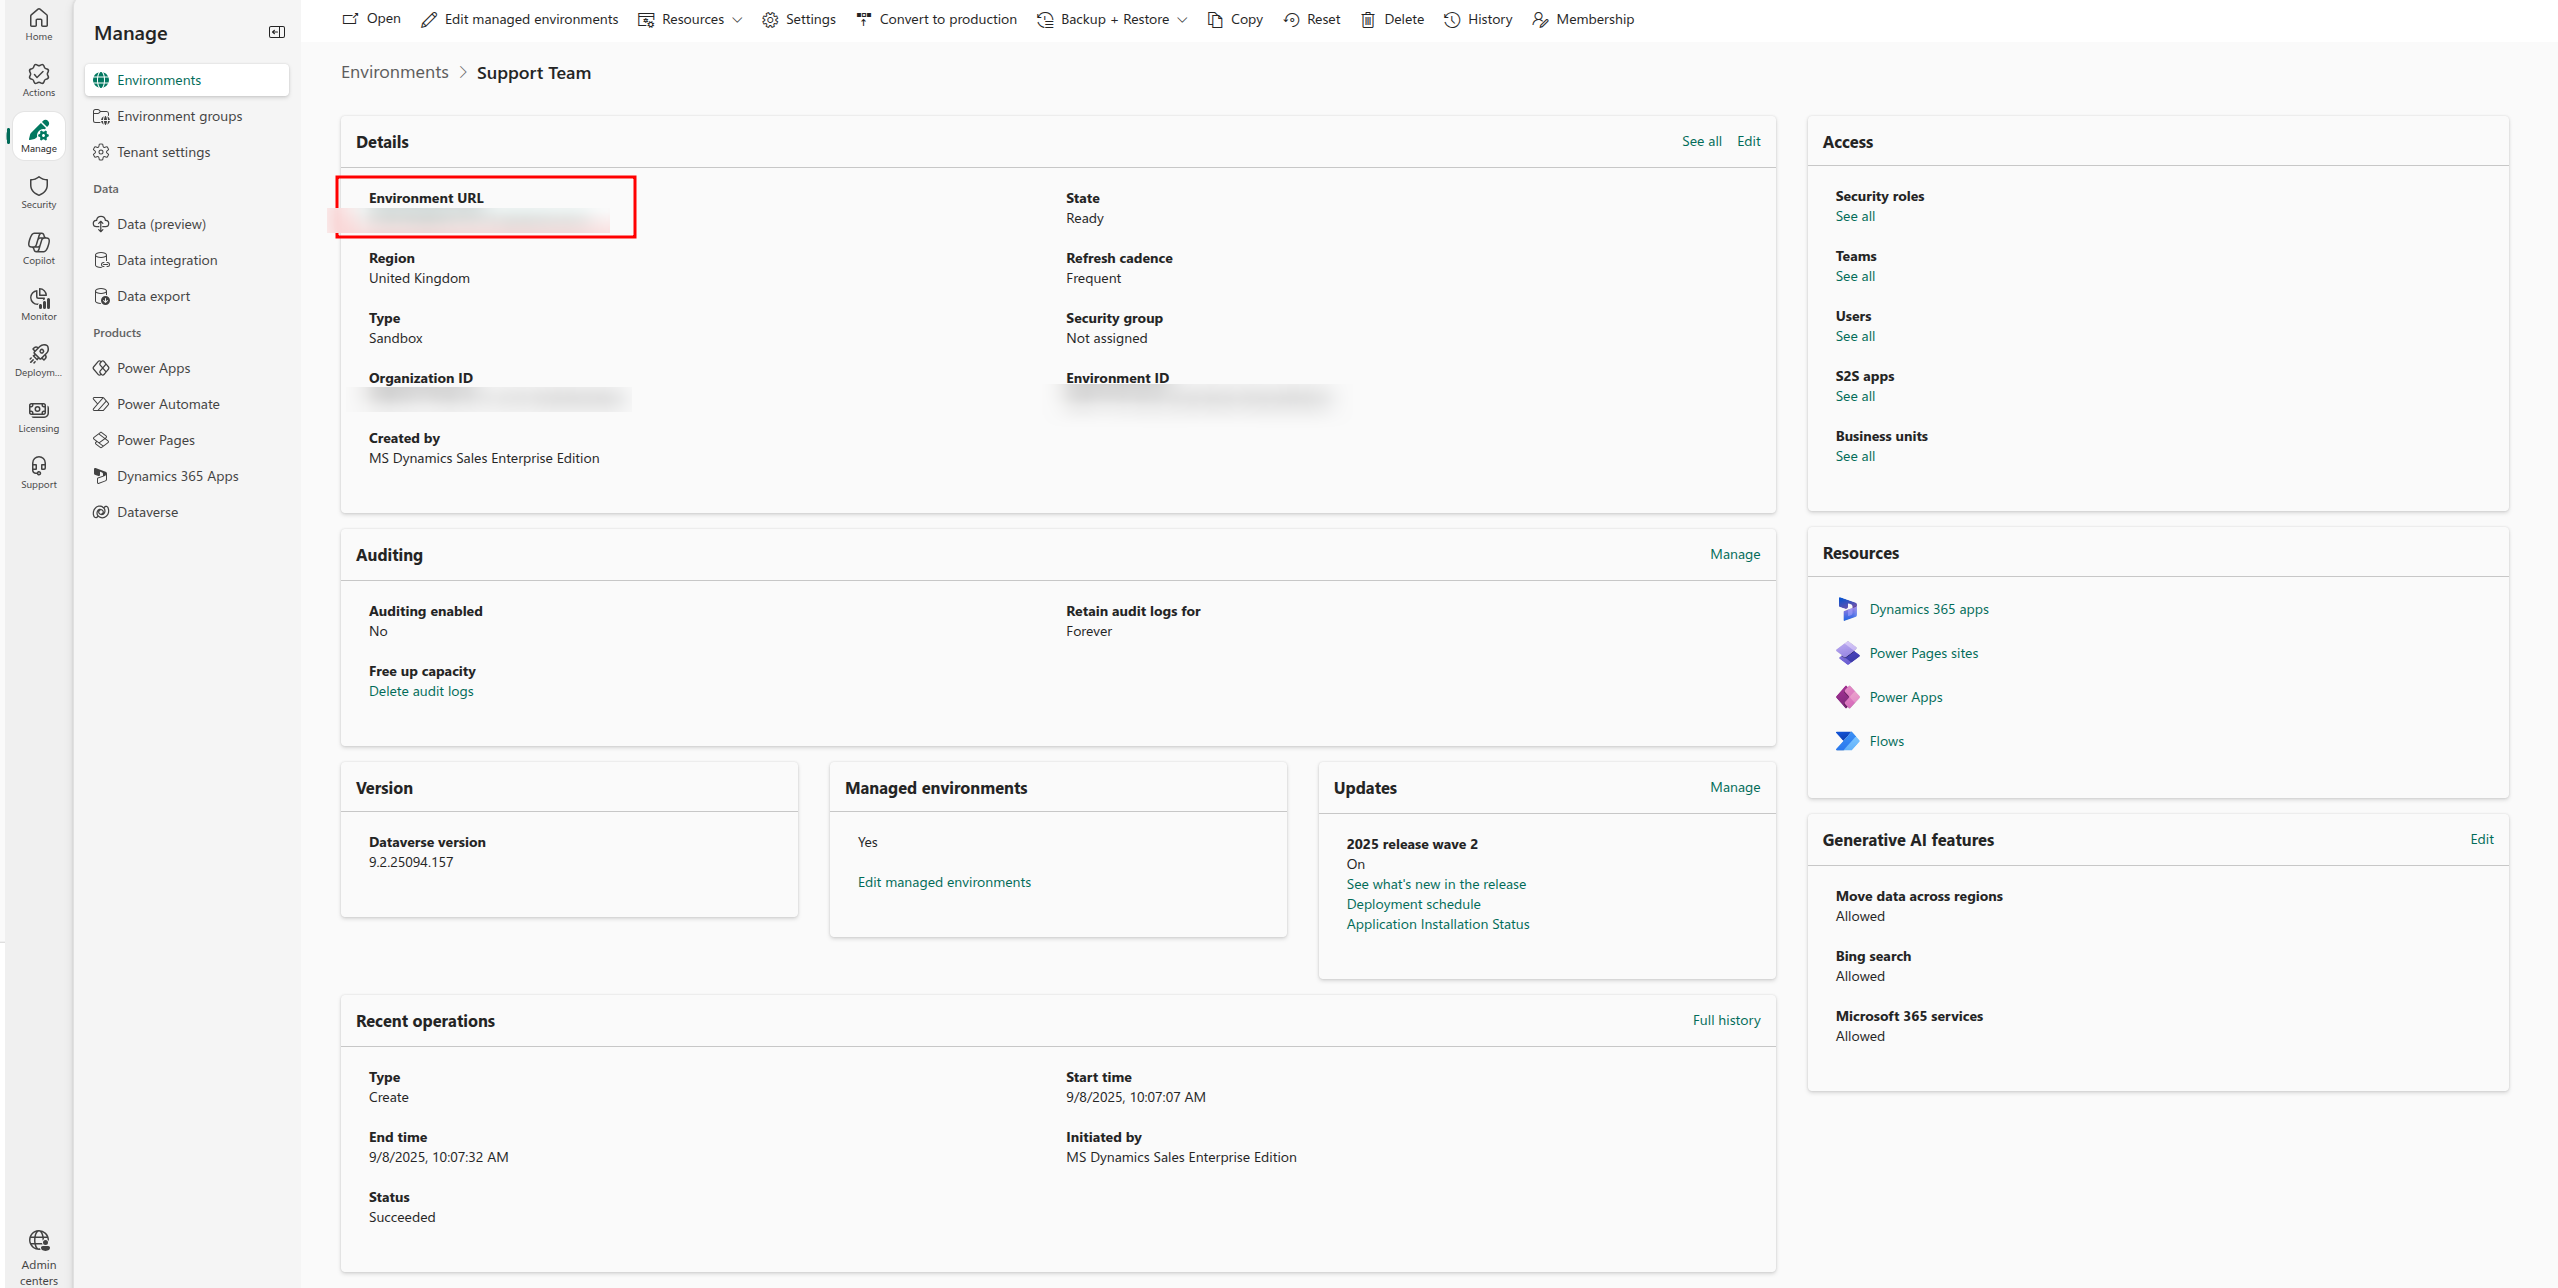
Figure 22: Locating the Dynamics 365 Page URL
2.2 Notes
Ensure that the API version and CRM URL correspond to your organization’s Microsoft Dynamics environment.
The URL typically follows the format:
https://<organization_name>.crm4.dynamics.com
Incorrect configuration of these parameters can cause connection or authentication issues
when attempting to synchronize contacts and call logs between PBXware and Microsoft Dynamics.
Application ID
To find your Application ID, navigate in the Azure portal to: App registrations → Application ID.
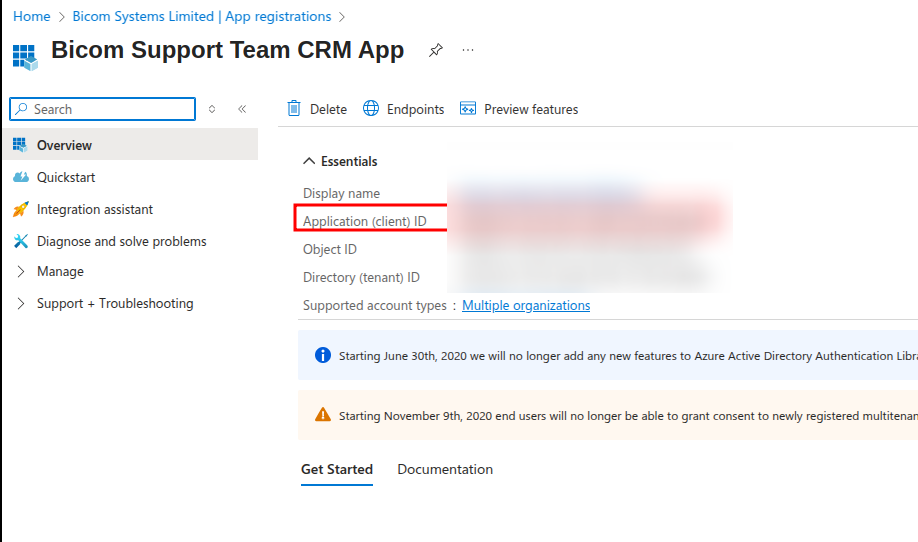
Figure 23: Locating the Application (client) ID in Azure Portal
Client Secret
In Azure Active Directory, go to Certificates & Secrets. Under the Client secrets section. Otherwise, click on New client secret, create a new one, and copy the Value that is generated after that process.
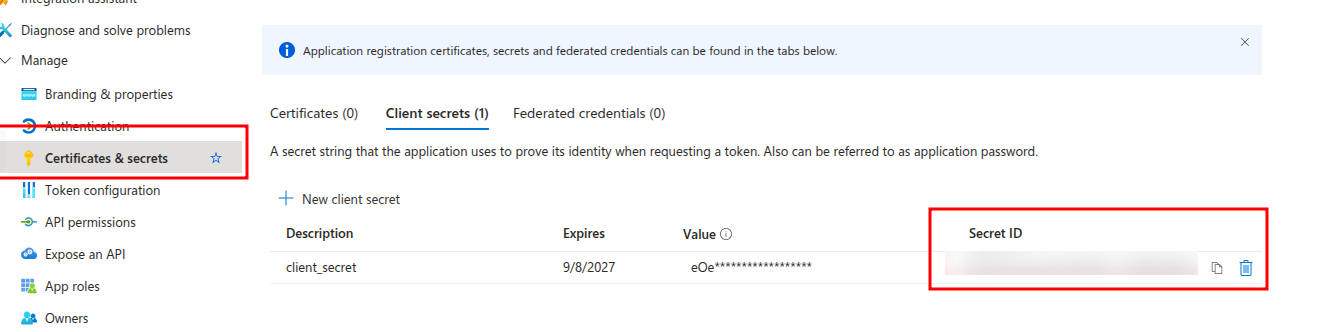
Figure 24: Locating or Creating a Client Secret in Azure Portal
OAuth Token Endpoint
In Azure Active Directory, go to the Overview tab and click on ‘Endpoints’. Copy the value in ‘OAuth 2.0 token endpoint (v2)’, for example: https://login.microsoftonline.com/{tenant}/oauth2/v2.0/token
For the tenant value, use your Directory (tenant) ID found in: App registrations→ Directory (tenant) ID.

Figure 25: Locating the OAuth 2.0 Token Endpoint in Azure Portal
Testing the Integration in PBXware
Once all fields (Application ID, Client Secret, OAuth Token Endpoint, and Page URL) are correctly configured in PBXware, you can test the connection to Microsoft Dynamics CRM.
1. Open the CRM Integration section in PBXware.
2. Fill in all the required fields with the values obtained from Azure and Dynamics
365.
3. Click on the Test button.
When you click on Test, a CRM test page will open. You must enter your Microsoft 365 account credentials
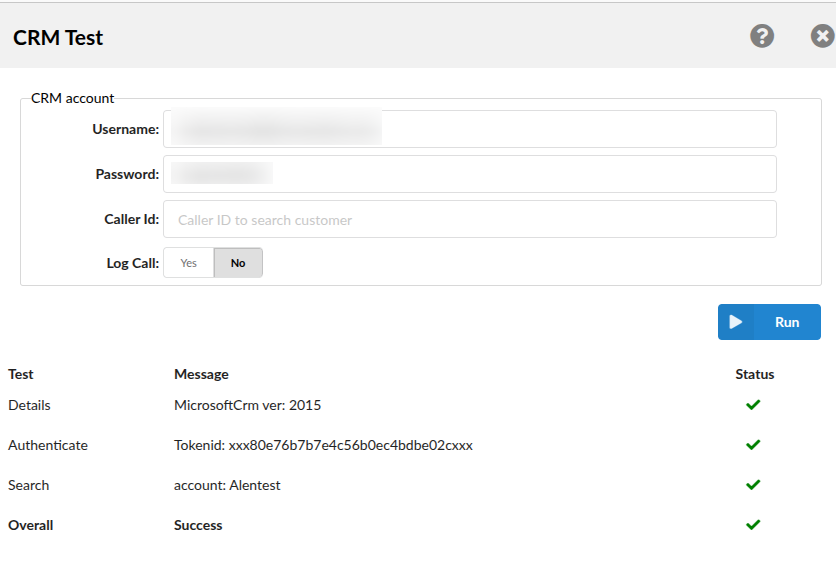
Figure 26: Microsoft Login Page Prompt After Clicking “Test” in PBXware