Single Sign-On (SSO) is an authentication method designed to enhance the user experience. It achieves this by allowing users to access multiple applications or services with just one set of login credentials, eliminating the need to log in repeatedly across different systems.
In contrast to traditional authentication, where users must manage and enter separate credentials for every application, SSO streamlines the process. By logging in once, users gain seamless access to various services without the hassle of re-entering their username and password for each one individually.
IMPORTANT:
SSO is enabled as GloCOM/Communicator and per Tenant.
SSO (Single Sign-On) functionality can be extended across multiple domains. To achieve this on Microsoft, a user from a different domain must log in via SSO. This process requires the user to grant permission through a pop-up window to the application that has been configured. Crucially, the same application must also be granted permissions within the environment where the specific user is configured. Once these steps are completed, the user should be able to access SSO on PBXware OSC.
Achieving this on Google should be straightforward, administrator should add domain from where user comes from to Authorized domains.
Configuration (Google/Microsoft)
1. Open the Google Developers Console in your browser and log in to your account
2. Click Select a project -> New project -> Enter Project name -> Create


3. Make sure correct Project is selected and proceed clicking on OAuth consent screen

4. Once OAuth consent screen is opened, you might be displayed with the following:
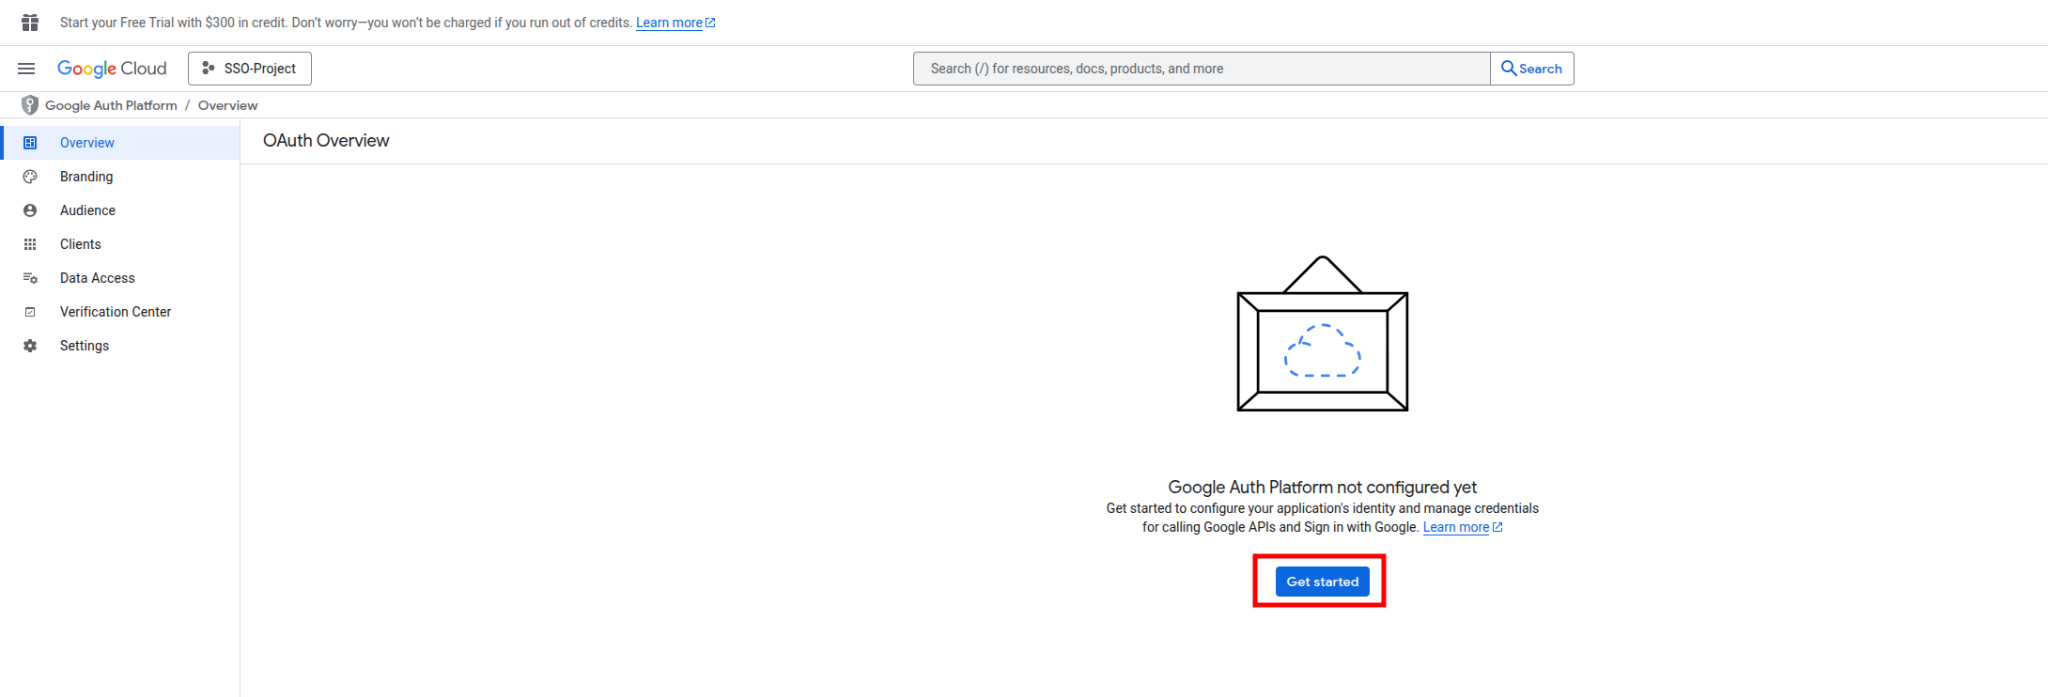
Click on Get started, and fill out App name and User support email, once done click on Next

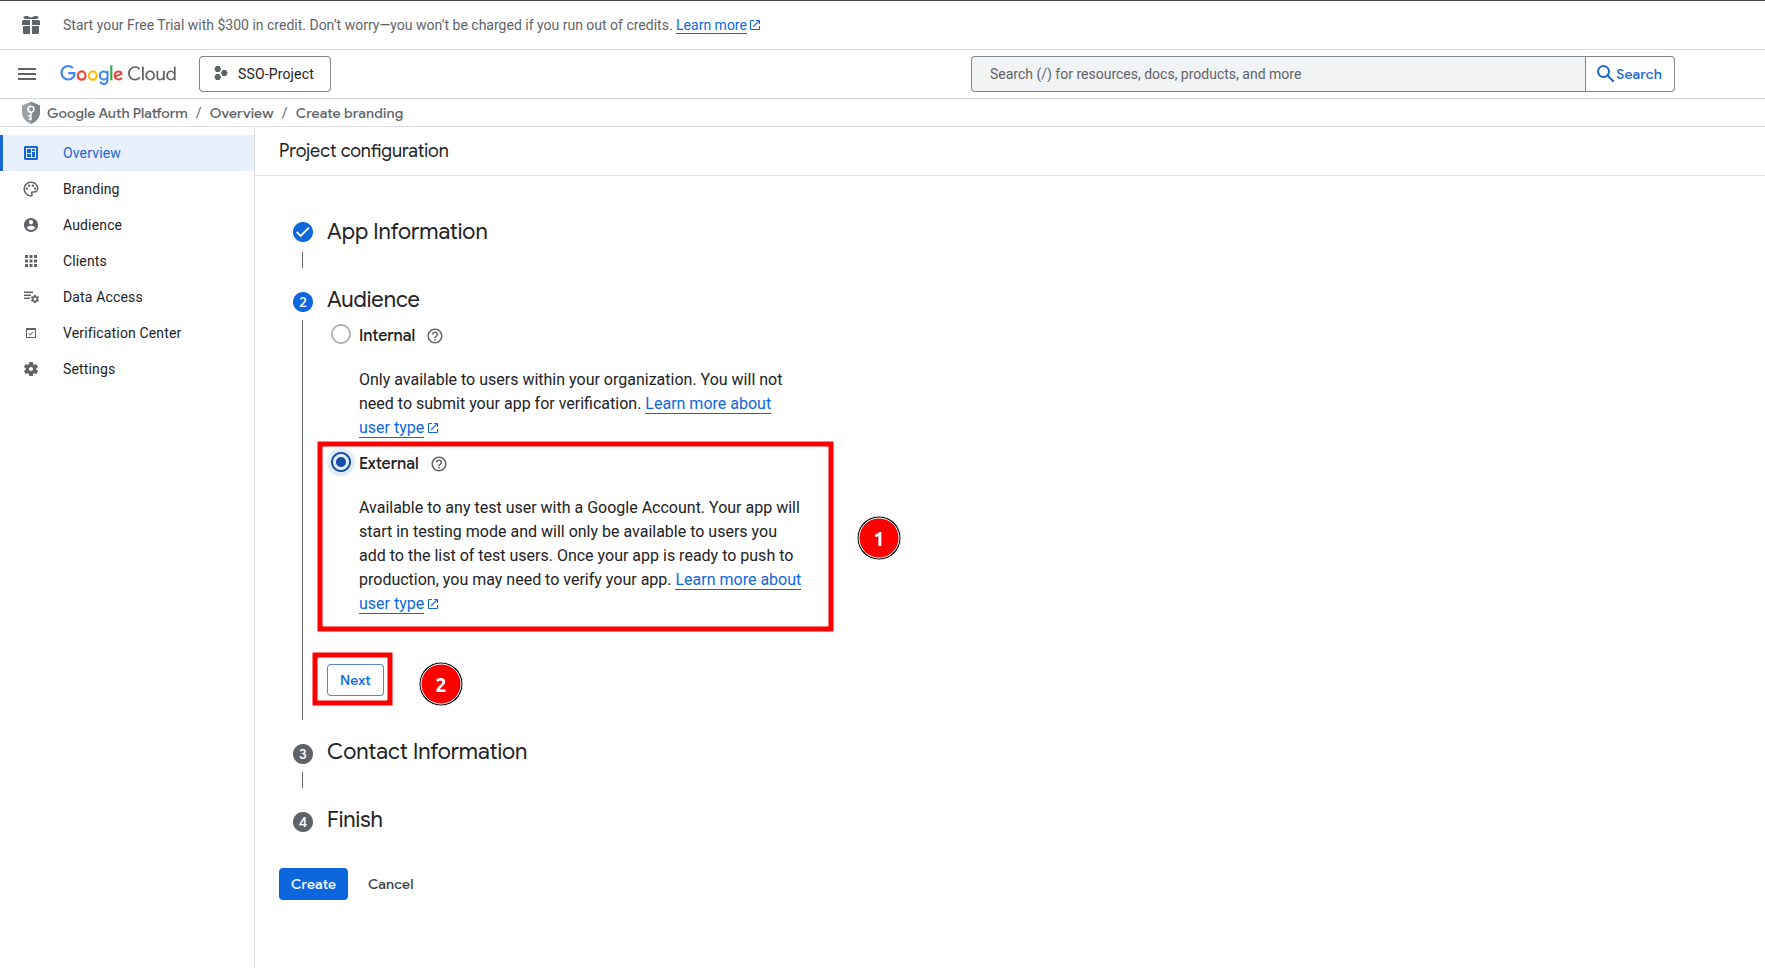
5. Configure Audience to External, and click on Next
6. Set Contact Information and click on Next

7. Mark checkbox I agree to the Google API Services User Data Policy -> Continue -> Create

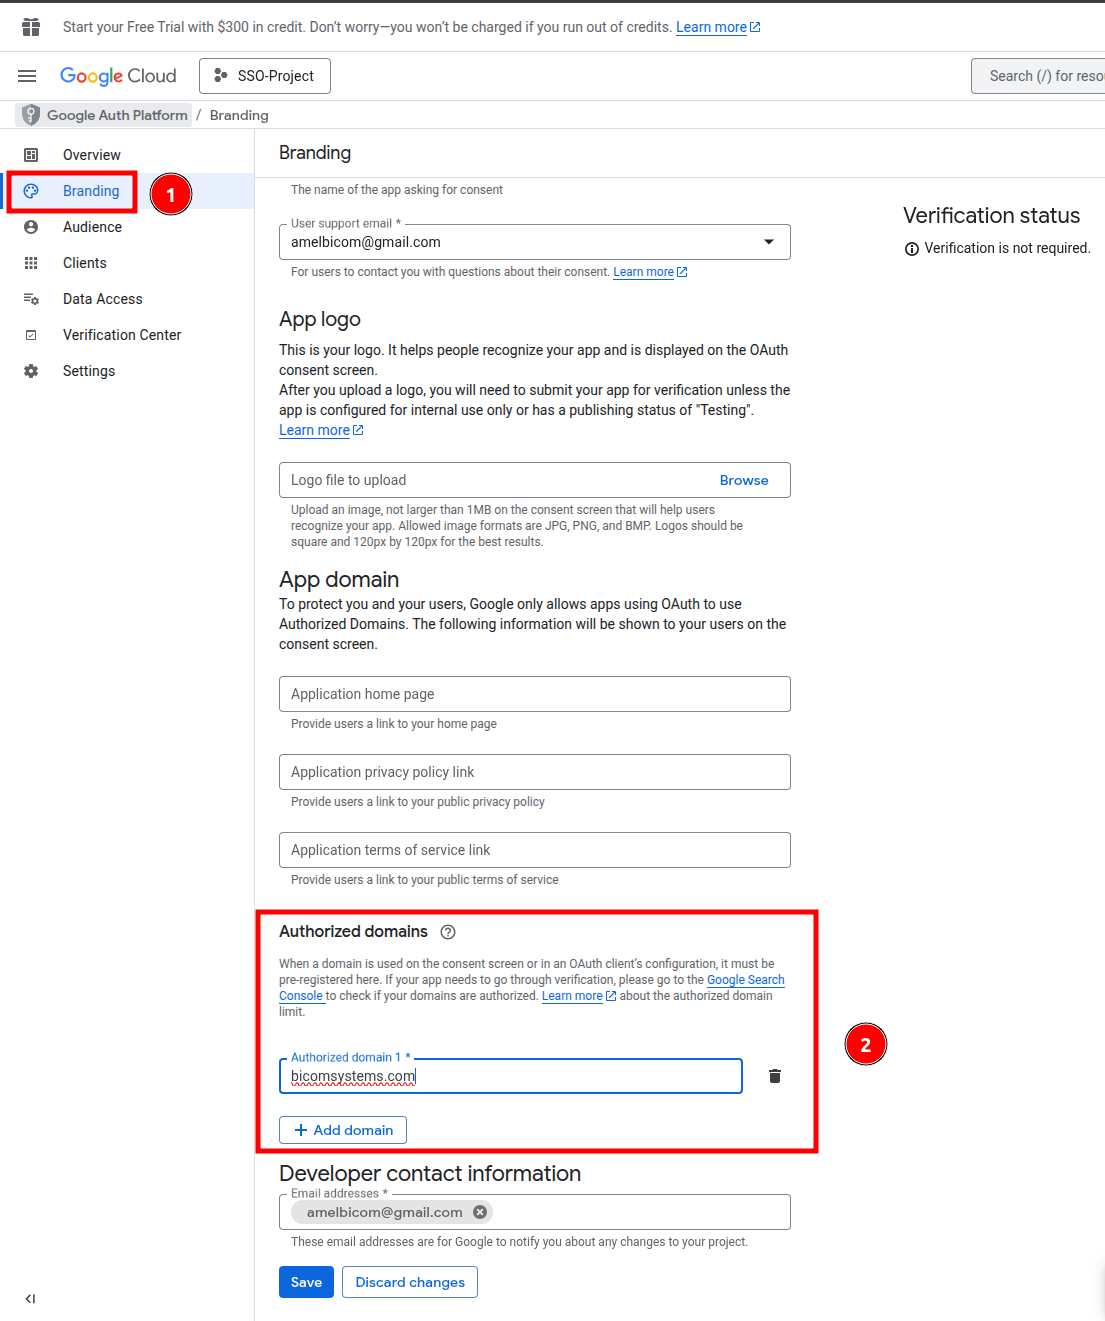
8. Navigate to Branding -> Authorizeddomains and set domain from which you want to access PBXware environment and click on Save
9. Locate yourself at Data Access -> Add or remove scopes

Select openid, userinfo.profile, userinfo.email scopes and click on Update
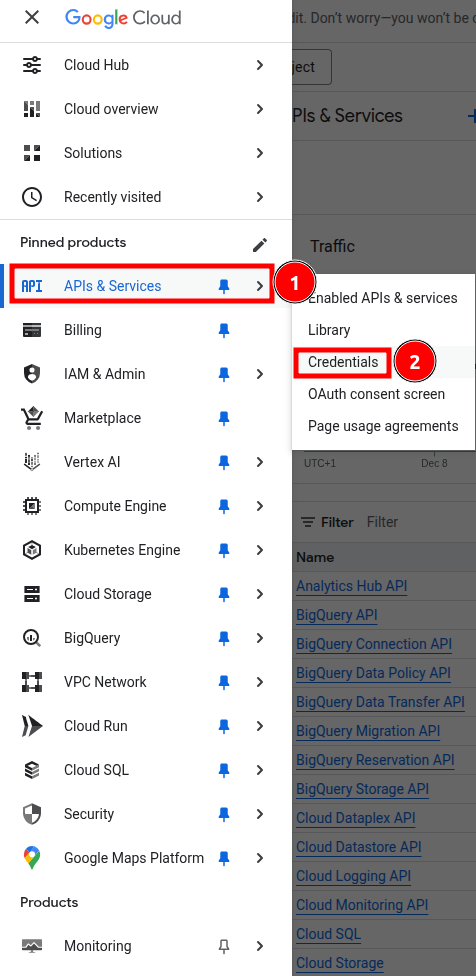
10. Go to Navigation menu

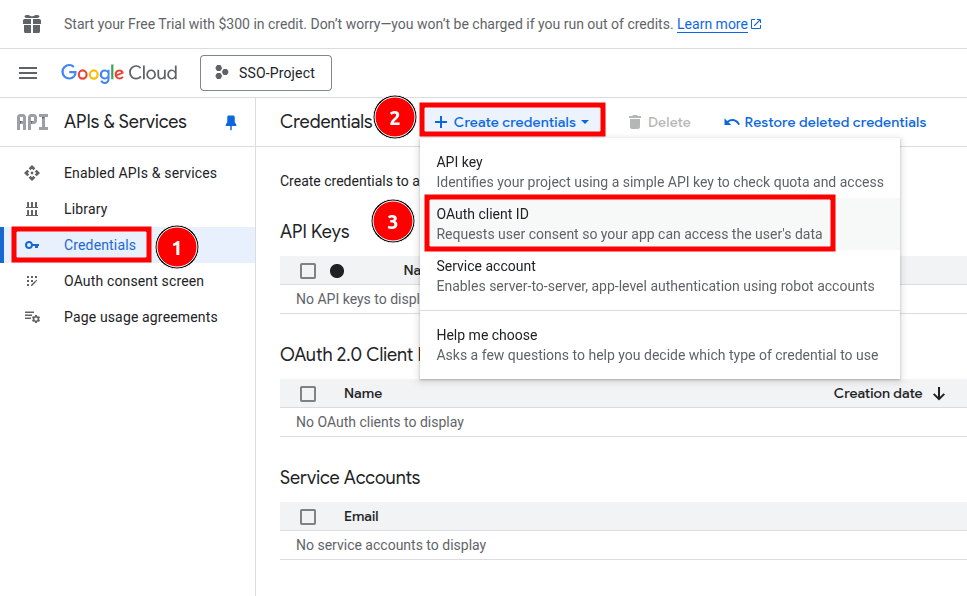
Select APIs & Services -> Credentials
Credentials -> Create credentials -> OAuth client ID
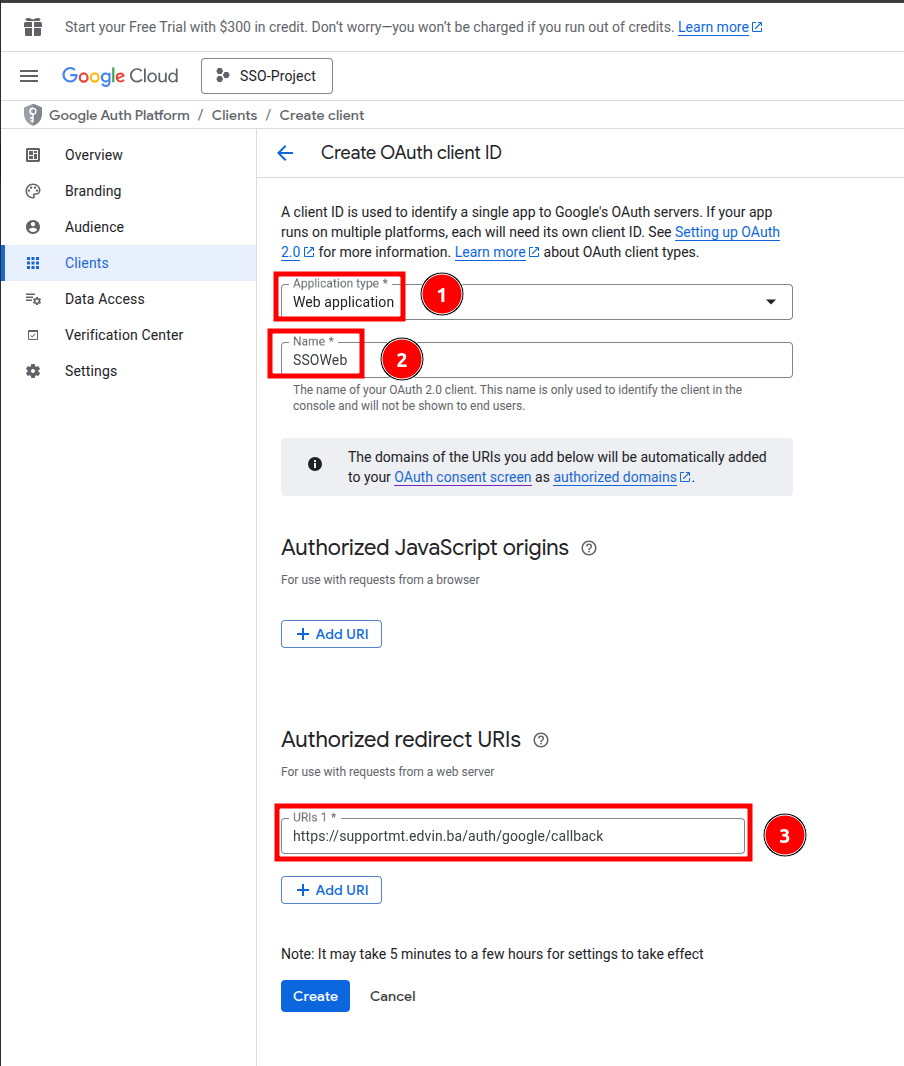
11. Choose Web application as Application type -> enter Name -> configure Authorized redirect URIs in format your-domain/auth/google/callback -> Create
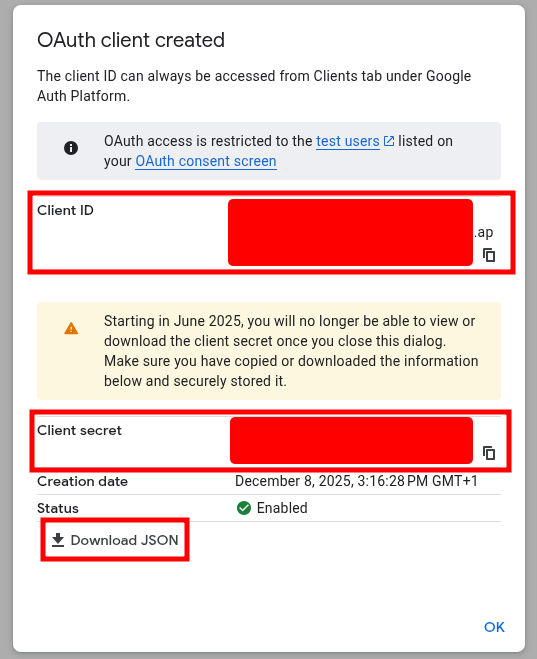
12. Copy Client ID and Client Secret to safe location or download JSON, since both will be used for configuration on PBXware
Microsoft
1. Locate yourself at Azure Portal home -> Azure services -> Microsoft Entra ID

2. Click on Add -> App registration

3. Fill out registration information as per the screenshot:

NOTE: Redirect URI must be in format: domain_name/auth/azureadv2/callback
Once done, click on Register
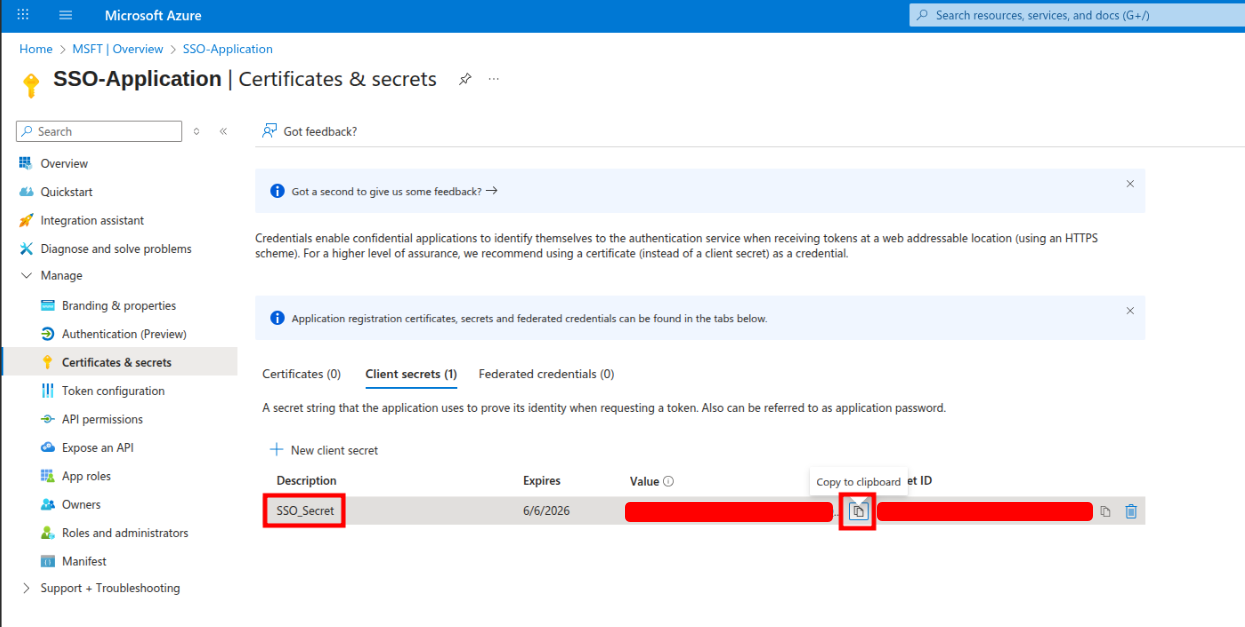
4. Next step is generating Client Secret. Position yourself at newly created application and go to Certificates & Secrets
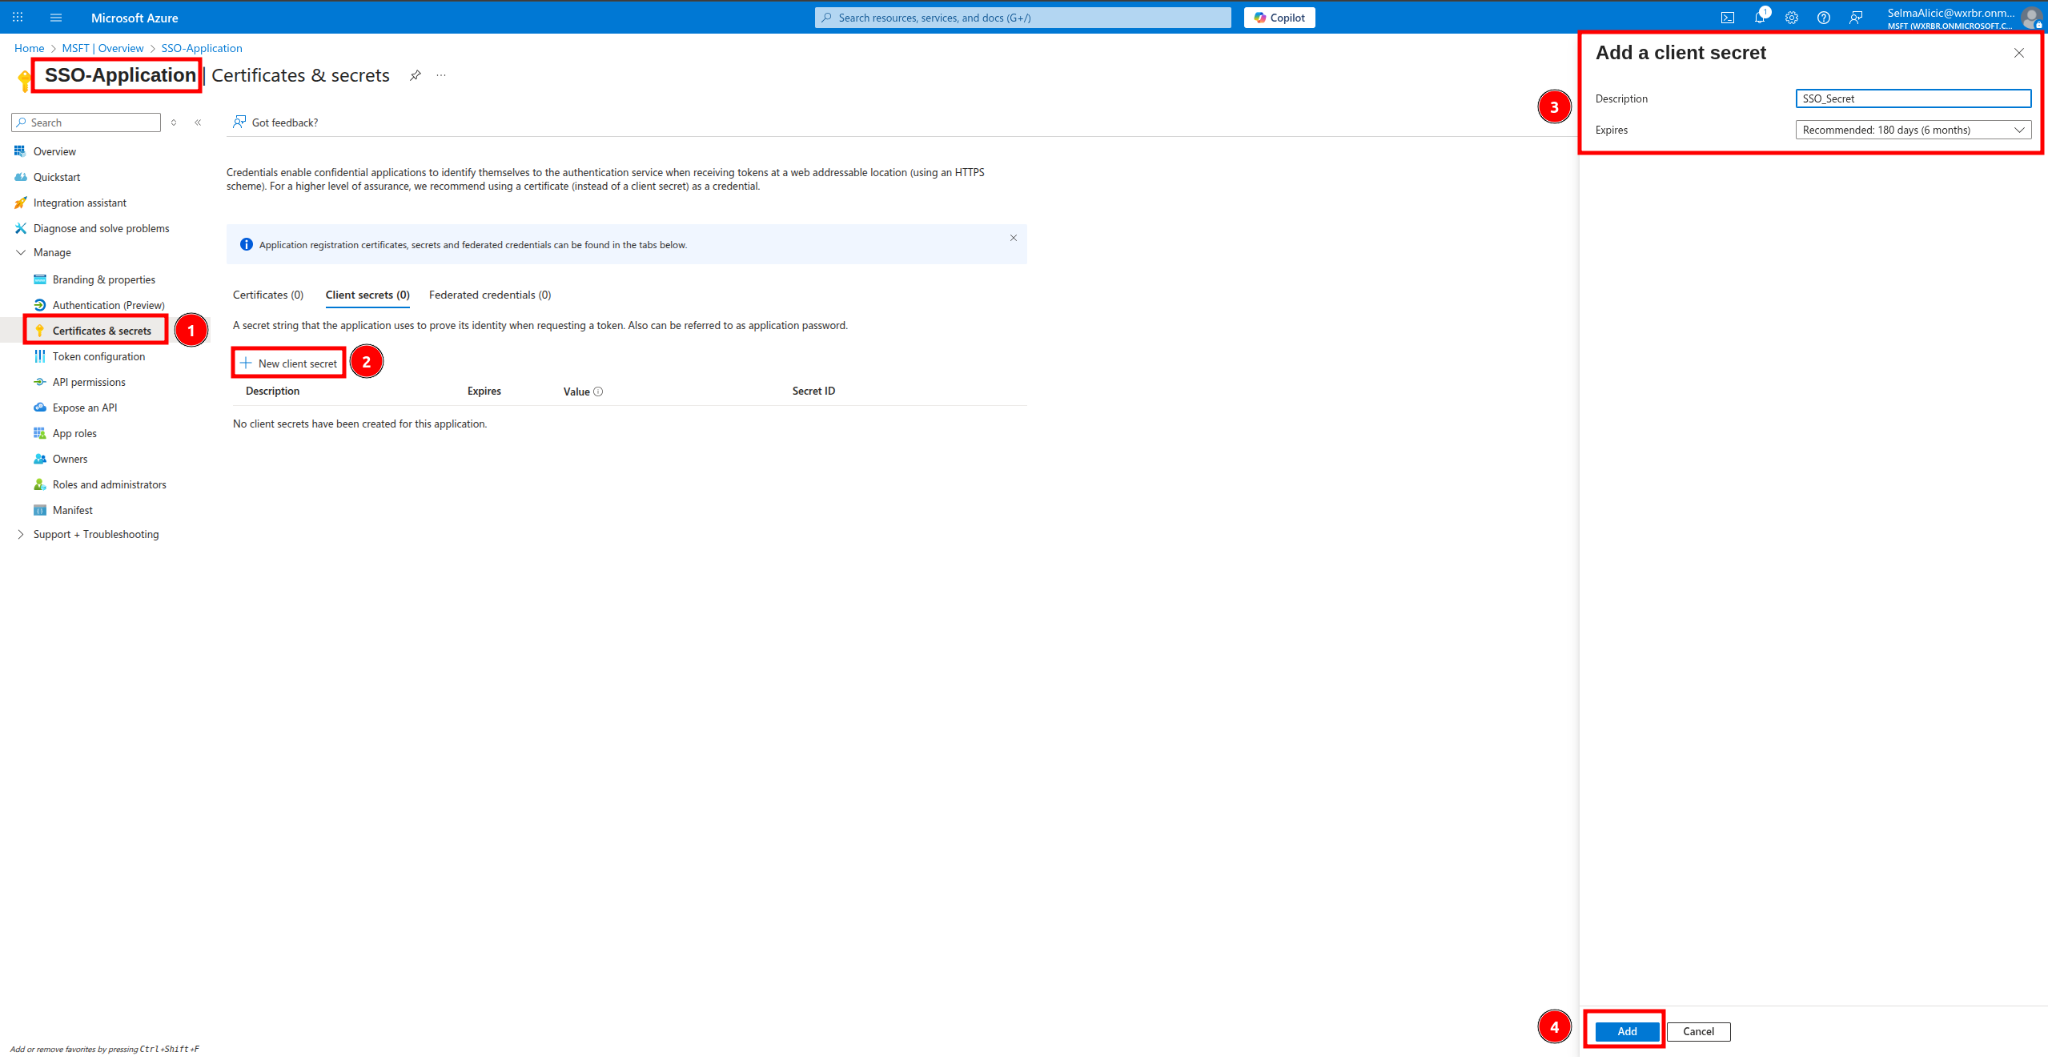
New client secret -> Description -> Add
5. Copy Client Secret Value
6. Go to Overview -> copy Application (client) ID

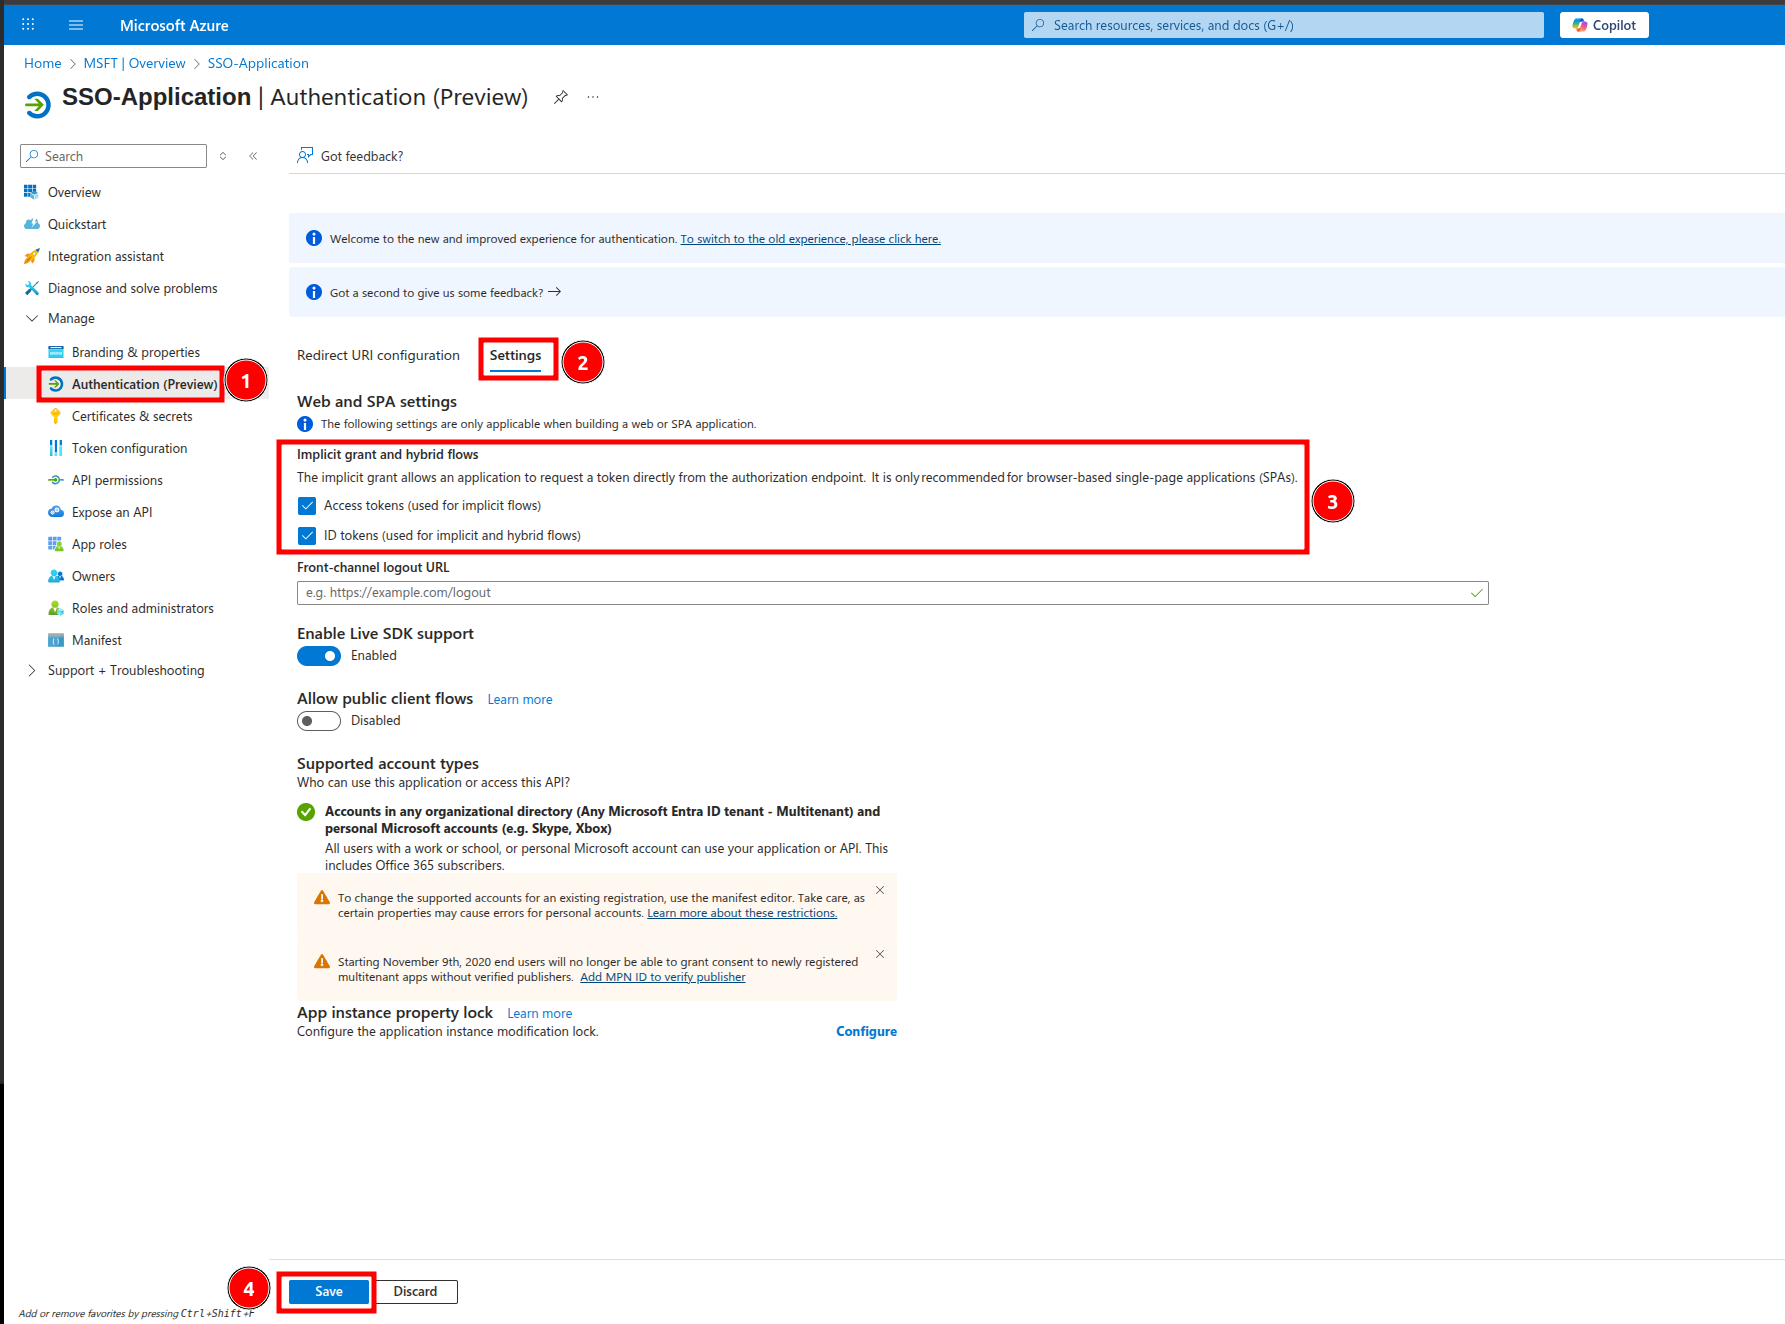
7. Click on Authentication (Preview) -> Settings -> Implicit grant and hybrid flows -> select checkboxes for Access tokens and ID tokens -> Save
8. Click on API Permissions -> Add a permission -> Microsoft Graph

and then click on Delegated permissions -> Add email, offline_access, openid, profile

finish with Add permissions
NOTE: After you complete the configuration, if you experience any issues logging in using the
Microsoft service, please go back to the API Permissions page and click the Grant admin
consent for Default Directory button

Configuration PBXware
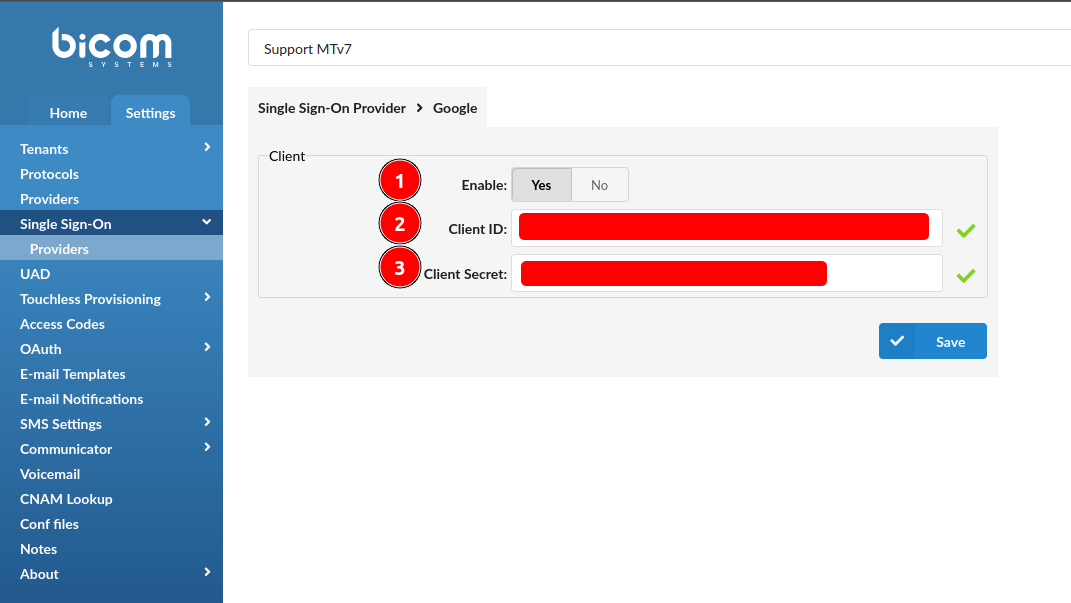
1. MasterTenant > Settings > Single Sign-On > Providers: Google/Microsoft

2. Use Client ID and Client Secret obtained from provider
Google:
Microsoft:

NOTE: In the case of the Tenant ID field, this field can remain empty, and the default value for
the tenant is common in that case
3. SSO can be enforced on Tenant level (MasterTenant -> Settings -> Tenants -> select a Tenant) and set to expire after a certain period

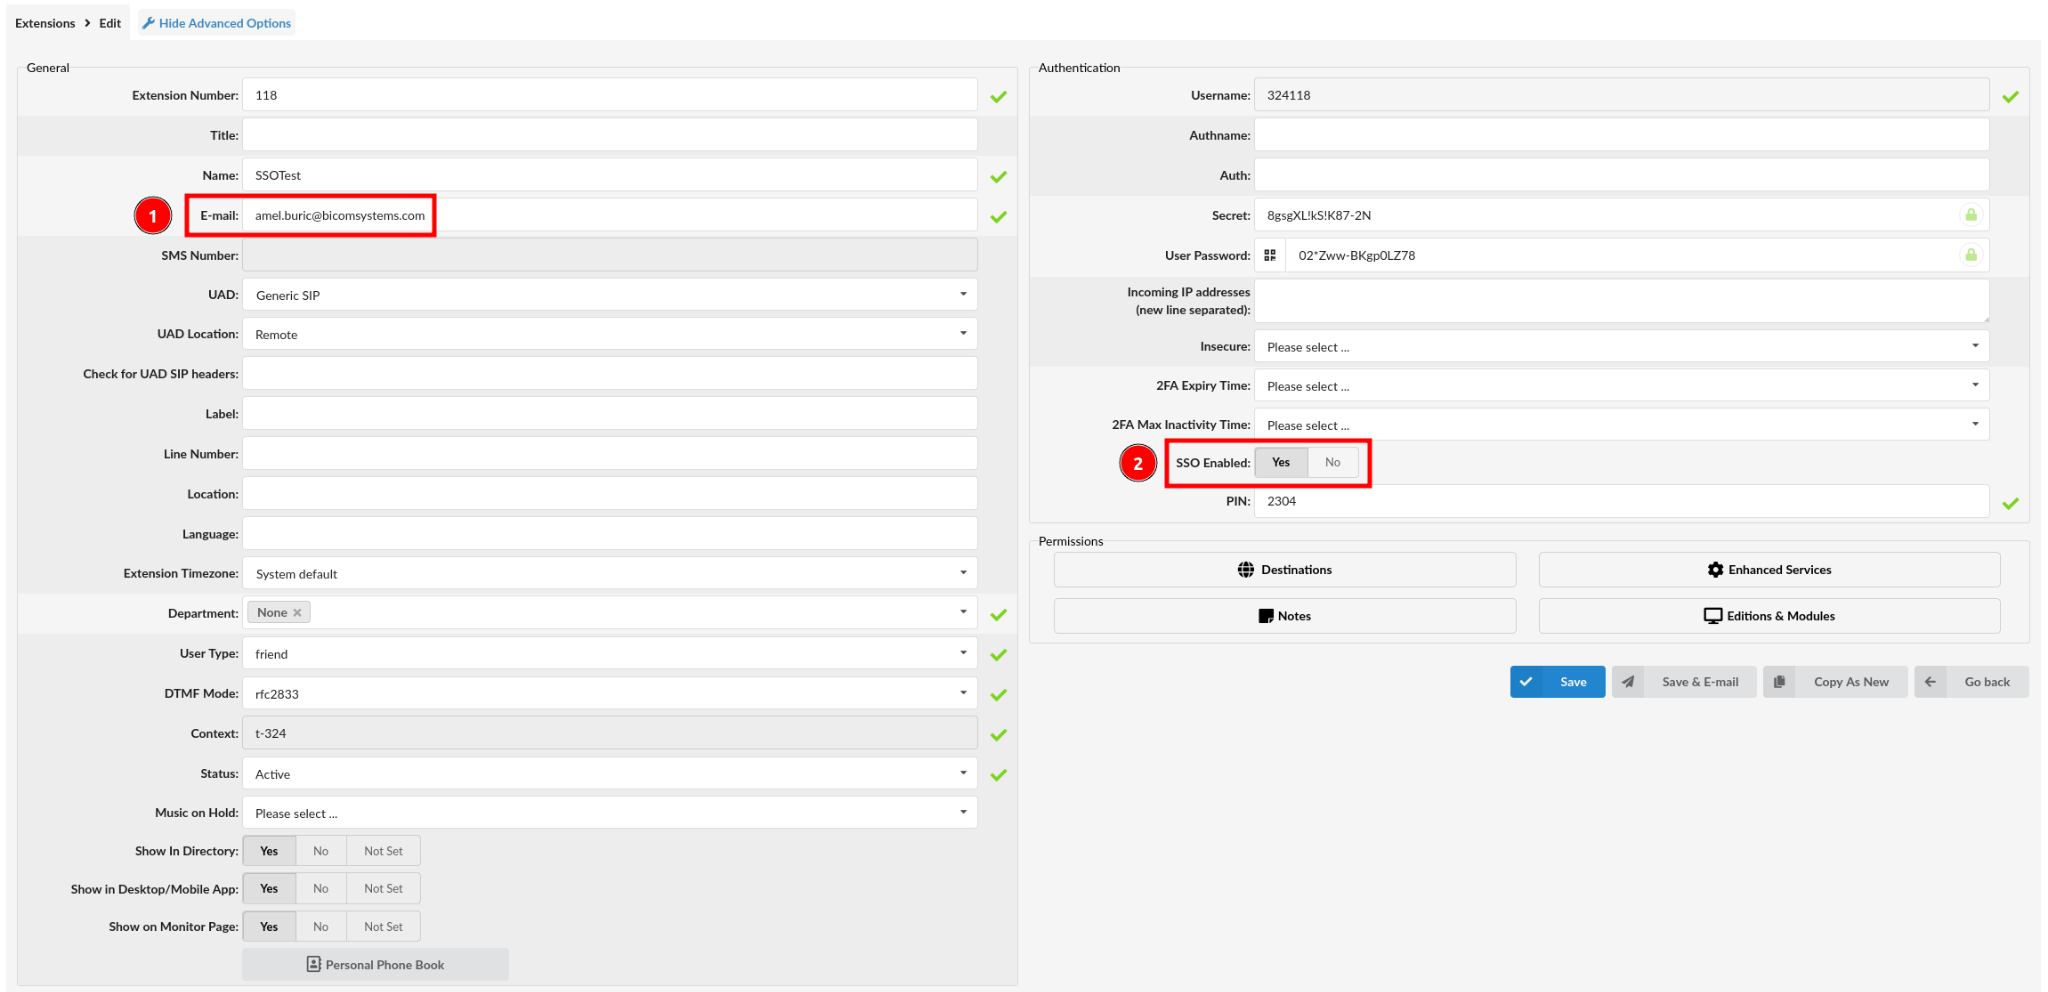
4. On extension level, email must come from domain configured earlier as an Authorized domain and SSO Enabled must be set to ‘Yes’
LOGIN
After provider and PBXware configuration, user can now proceed to use SSO as a login option
1. Use SSO login button depending on what is configured on PBXware (Google/Microsoft)

2. Click on Continue on the consent screen
Google:

Microsoft:

3. If everything is correctly configured, you should be able to login to OSC

GloCOM/Communicator SSO login
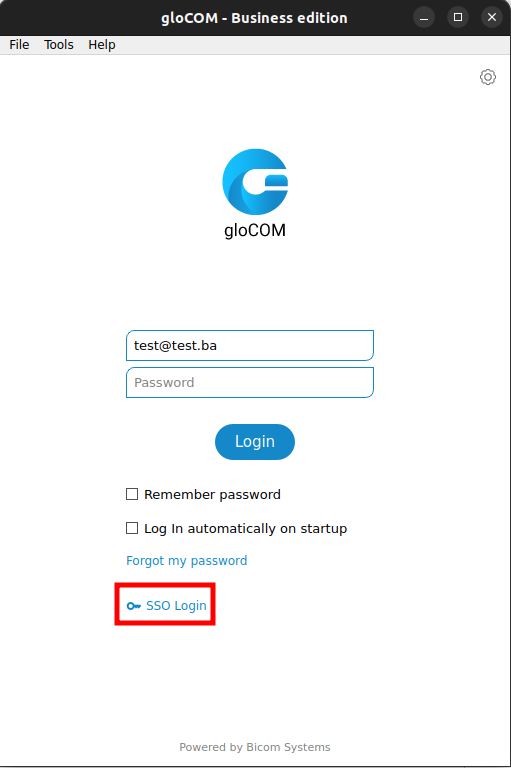
1. Open application and use SSO Login button
2. Configure domain name to which you will log into and click on Next button

Application will go through SSO checkup
3. You will be displayed with SSO Login options Google/Microsoft

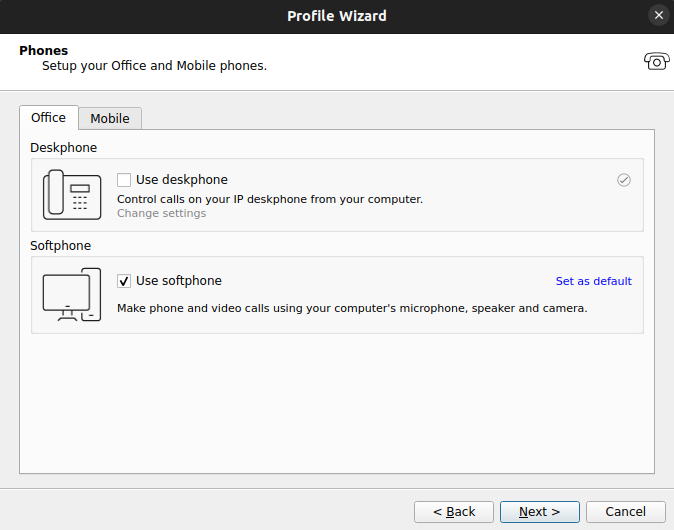
4. Once logged in, you have to go through Profile wizard
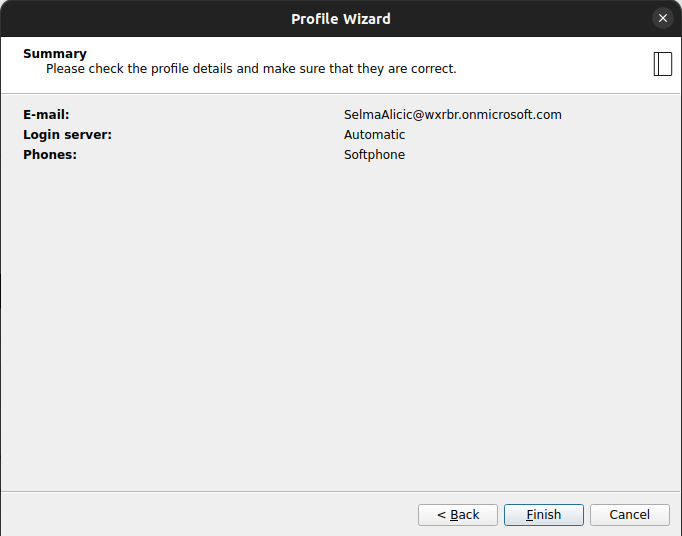
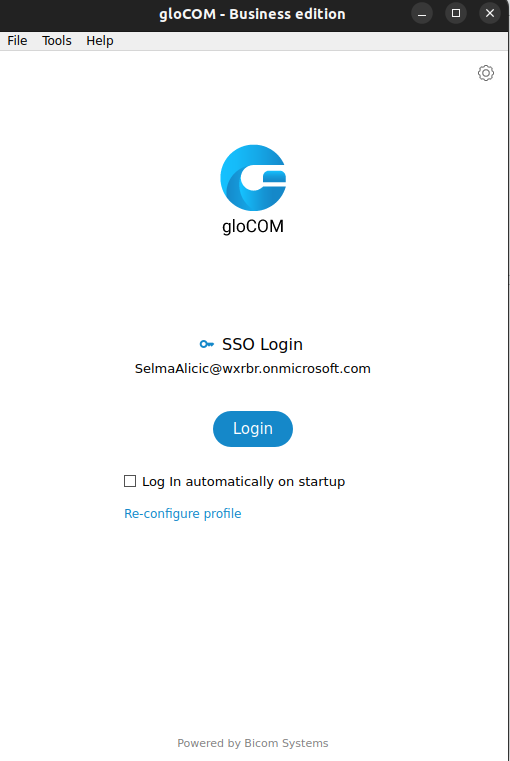
5.After finishing Profile Wizard configuration, you can now use SSO on Login page
Additional information:
Error: user ID incorrect.
Solution: update admin_site.pbxware_users_auth set userid_sso_provider='' where email='$email';