
MySQL is an open-source relational database management system used to store, manage, and retrieve structured data.
In PBXware, MySQL is a critical core service. The PBXware web interface, call processing logic, and nearly all backend services depend on MySQL. If MySQL is not running, the PBXware GUI becomes inaccessible and core functionality is disrupted.
To access the MySQL shell on a PBXware system, use the following command:
/opt/pbxware/sh/mysql
For systems with large databases, faster startup can be achieved using:
/opt/pbxware/sh/mysql -A
The -A option disables auto-loading of table and column metadata, which significantly improves startup time on large systems.
To show all available databases we would use the command: show databases;
In PBXware it would look something like this:
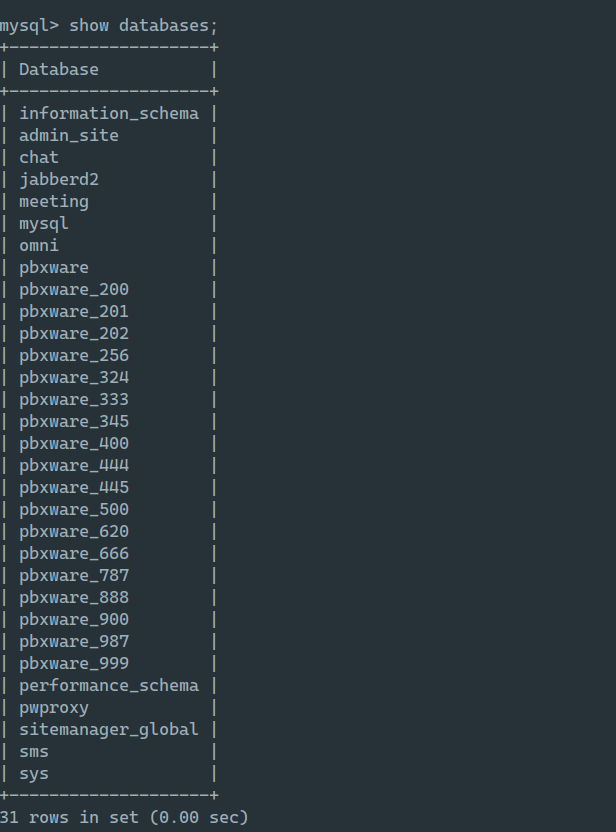
To proceed using any of the databases shown, we would have to select the specific one with the command: use $databasename. For this example we will go with: use pbxware;
After using the command we would see the prompt:
mysql> use pbxware;
Database changed
To show the content of the database that is currently selected we would use the command:
show tables;
The output would look something like this:
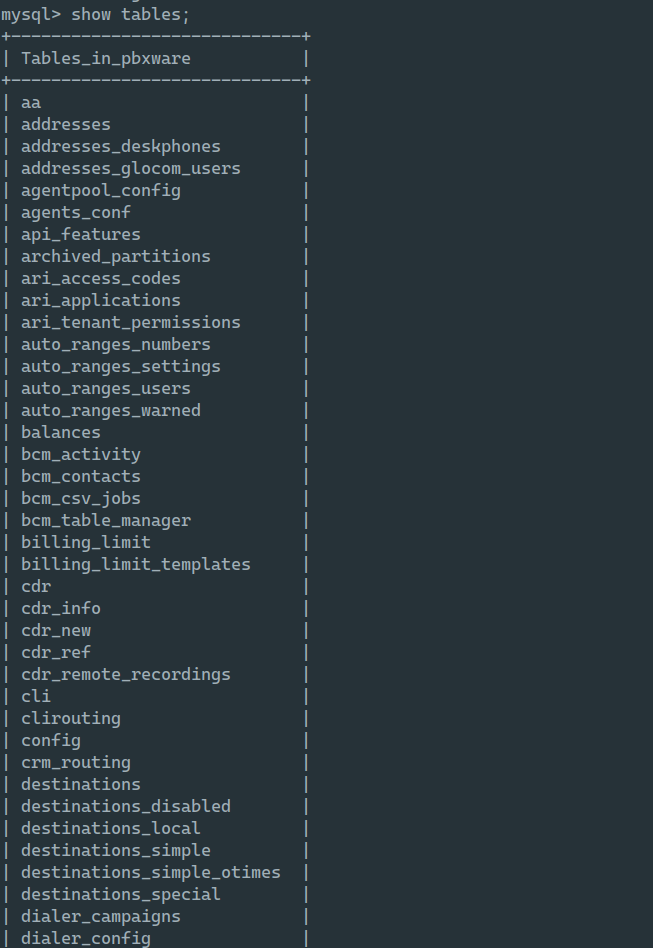
The command to show the output of the specific table we would use the command:
select * from $tablename;
For example select * from tenants;
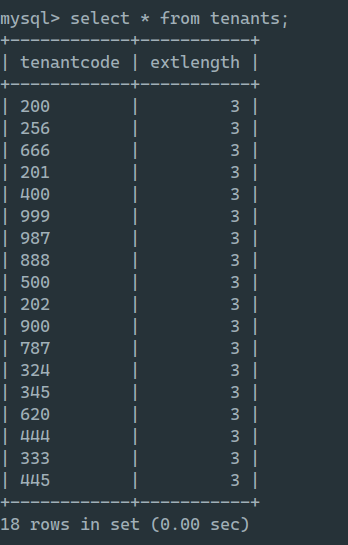
As it can be seen here, this query would show us the content of the tenants table.
This query could be used to select more specific parts of the table. For instance we could list the content per tenantcode table.
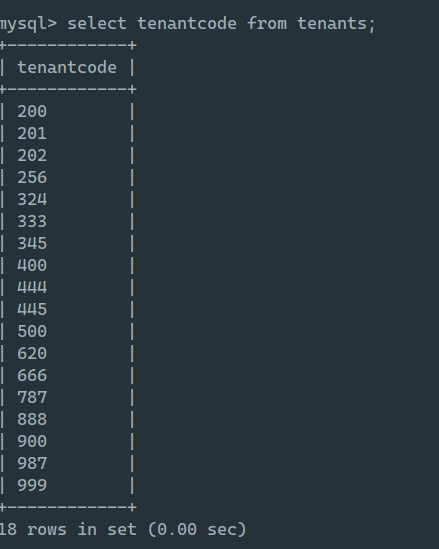
To be even more specific we can search per tenant code, with the query:
select * from tenants where tenantcode = “345”;
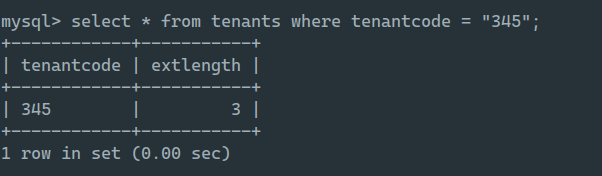
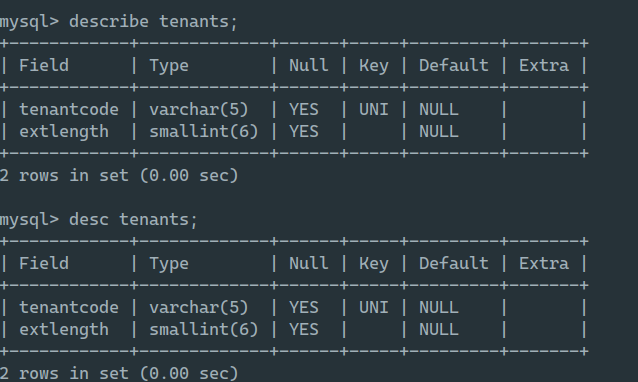
However to see the contents of the tables, to even know the tenantcode is in a specific table, we can use the query: describe tenants; Or the keyword ‘desc’ can be used
In addition to options mentioned so far, few other fundamental statements can be used, specifically
UPDATE and DELETE statements.
The DELETE statement permanently removes one or more rows from a table based on a condition.
The UPDATE statement modifies existing data in one or more rows of a table, without deleting them.
One note to keep in mind for the DELETE statement is that if the statement is used the change is irreversible.
The query structure for these two statements would be:
DELETE FROM table_name WHERE condition;
UPDATE table_name SET column1 = value1, column2 = value2 WHERE condition;
A PBXware specific examples would be:
DELETE FROM users WHERE id = 103;
UPDATE users_callerid_list SET callerid = 'John Doe <1000>' WHERE user_id = 103;
In some instances when using the ‘select’ statement the output can be overwhelming and difficult to read, like in this example:
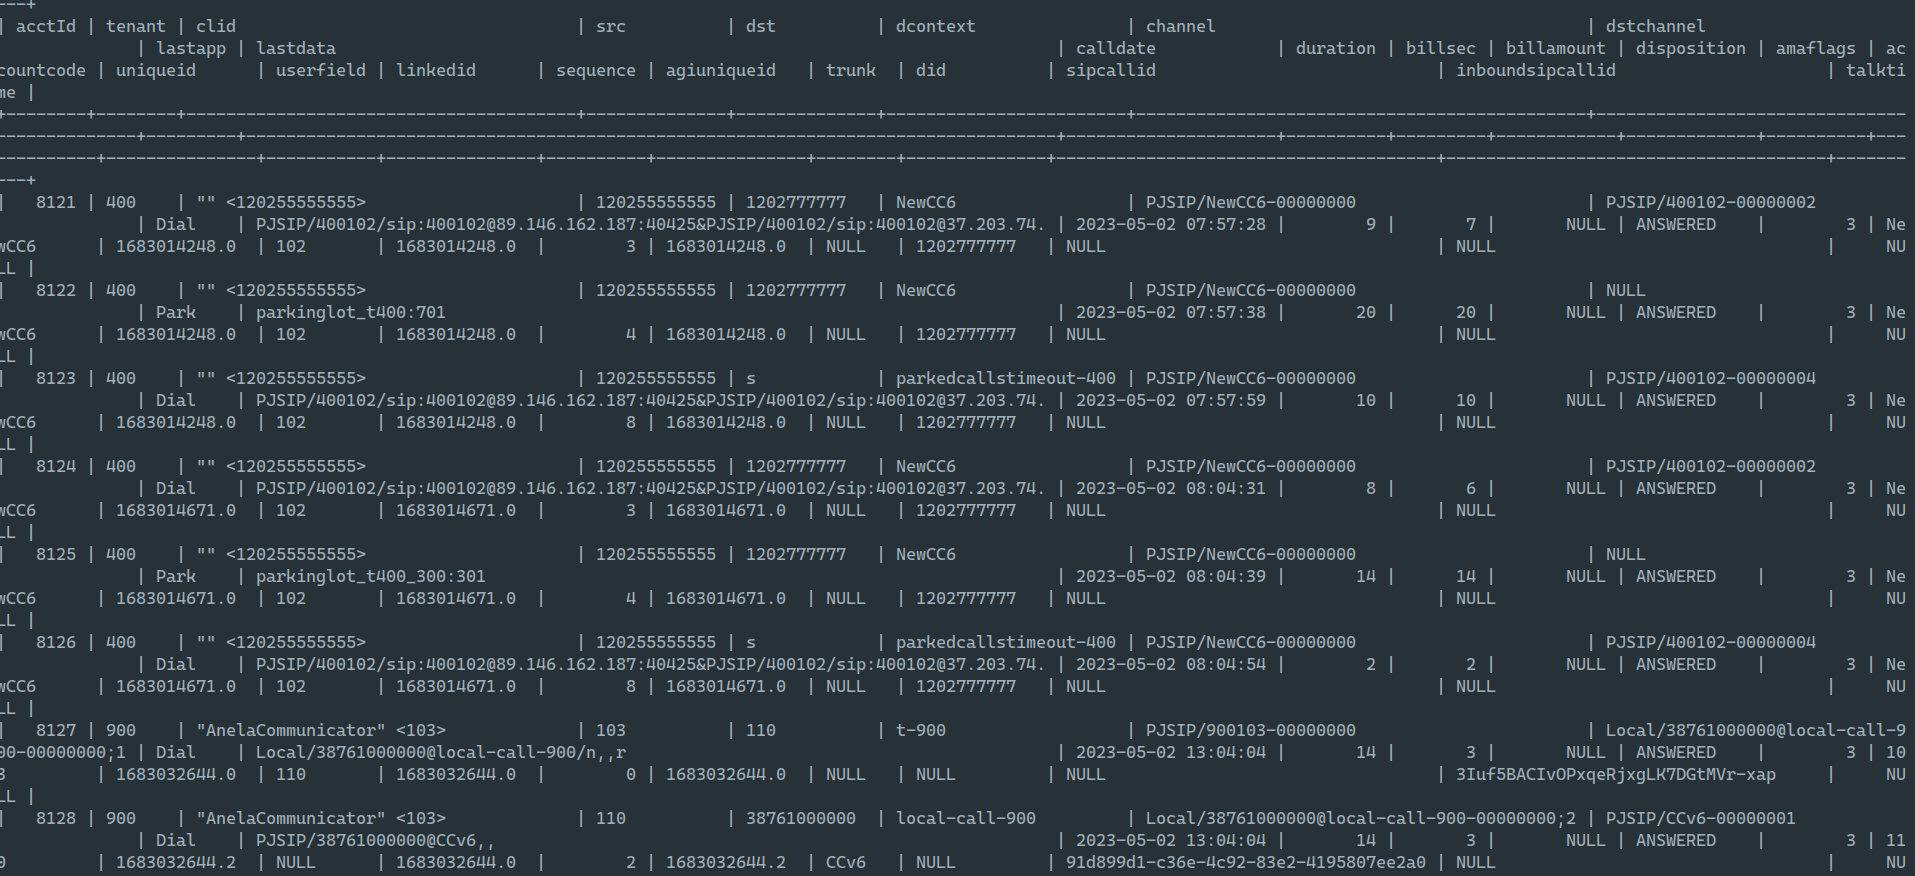
To make it a bit easier to read we can use the \G flag at the end of the query:
select * from cdr limit 50\G;
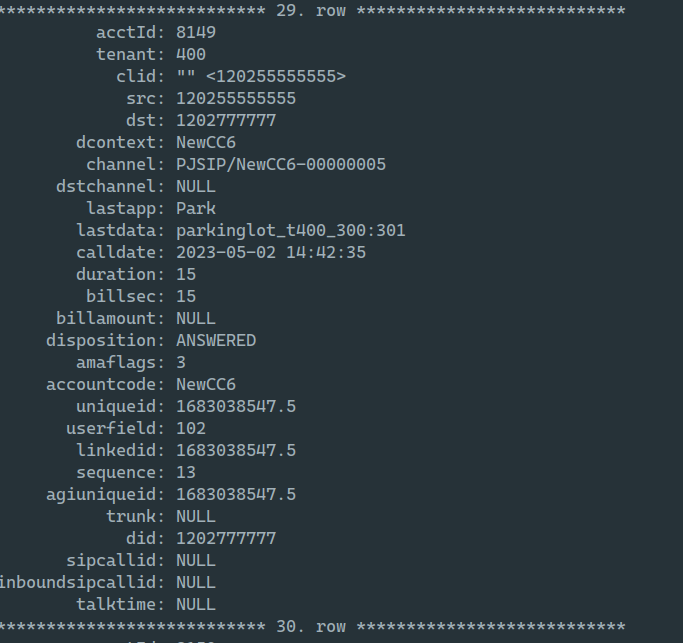
When using the \G flag we can see everything is sorted and easily readable. Additionally we can notice that the new ‘limit’ statement is used here. This statement would limit the number of rows being output, to 50 in this example.
MySQL has some advanced options as well that would make some of the work more easier.
One of the commands would be JOIN.In MySQL, a JOIN statement combines rows from two or more tables based on a related column between them. It’s used to retrieve data from multiple tables in a single query by matching records that satisfy a specified condition, typically defined in the ON clause.
SELECT columns
FROM table1
INNER JOIN table2
ON table1.column = table2.column;
The ON clause specifies the condition for matching rows between tables (e.g., table1.id = table2.id).
• Joins are essential for querying relational databases where data is spread across multiple tables.
• Performance depends on indexing; ensure related columns (e.g., id, user_id) are indexed for faster queries.
• You can chain multiple JOINs to combine more than two tables in a single query.
Another advanced statement in MySQL would be CONCATENATE. In MySQL, the CONCAT() function is used to combine (concatenate) two or more strings into a single string. It’s useful for merging data from multiple columns or adding literal strings to create a formatted output.
The syntax would be:
CONCAT(string1, string2, ..., stringN)
An example of this syntax in PBXware:
SELECT CONCAT(name, ' - ', value) AS user_info FROM users;
In MySQL, aggregate functions perform calculations on a set of values and return a single value. They are typically used with the GROUP BY clause to summarize data across rows, such as counting rows, summing values, or finding averages. Common aggregate functions include COUNT, SUM, AVG, MIN, and MAX.
Common Aggregate Functions
1. COUNT(): Counts the number of rows (or non-NULL values in a column).
2. SUM(): Adds up numeric values in a column.
3. AVG(): Calculates the average of numeric values in a column.
4. MIN(): Finds the smallest value in a column.
5. MAX(): Finds the largest value in a column.
In MySQL, a subquery is a query nested inside another query, used to return data that the outer query uses. Subqueries are enclosed in parentheses and can appear in various parts of a SQL statement, such as SELECT, WHERE, FROM, or HAVING clauses. They are useful for breaking complex queries into smaller, manageable parts or for filtering data based on results from another table.
Types of Subqueries
1. Single-Row Subquery: Returns one row and one column, often used with operators like =, >, <.
2. Multiple-Row Subquery: Returns multiple rows, typically used with operators like IN, ANY, or ALL.
3. Correlated Subquery: References columns from the outer query, executed repeatedly for each row of the outer query.
4. Multiple-Column Subquery: Returns multiple columns, less common but used for complex comparisons.
In MySQL, a Common Table Expression (CTE) is a temporary result set defined within a SQL query, which you can reference multiple times in the main query. CTEs are introduced using the WITH clause and are particularly useful for improving query readability, breaking down complex queries, and handling recursive or hierarchical data. They are supported in MySQL 8.0 and later.
Key Features of CTEs
• Temporary: The CTE exists only for the duration of the query.
• Named: You assign a name to the CTE, which you can reference like a table.
• Reusable: A CTE can be referenced multiple times in the same query.
• Non-recursive or Recursive: Non-recursive CTEs are like subqueries, while recursive CTEs can process hierarchical or iterative data (e.g., tree structures).
• Scoped: Available only in the query where it’s defined.
The syntax would be:
WITH cte_name AS (
SELECT ...
)
SELECT ... FROM cte_name ...;
However since PBXware mostly does not use 8+ versions, this syntax would not work.
In MySQL there is a way to increase the speed of the information retrieval using Indexing.
Indexing is a database optimization technique that improves the speed of data retrieval operations (e.g., SELECT, JOIN, WHERE) by creating a data structure (an index) that allows the database to locate rows more efficiently. Indexes are created on columns frequently used in queries, such as those in WHERE clauses, JOIN conditions, or ORDER BY statements. However, indexes come with trade-offs, as they can slow down INSERT, UPDATE, and DELETE operations due to the need to maintain the index.
Key Concepts of Indexing
• Index: A separate data structure (typically a B-tree or hash) that stores a sorted copy of selected column values, along with pointers to the corresponding rows in the table.
• Primary Key: Automatically indexed (unique and not null) to ensure fast lookups.
• Unique Index: Ensures all values in the indexed column(s) are unique.
• Clustered vs. Non-Clustered: MySQL’s InnoDB uses a clustered index for the primary key (data is stored with the index), while other indexes are non-clustered (separate from the data).
• Trade-offs:
◦ Pros: Faster query performance for SELECT, JOIN, and filtering.
◦ Cons: Increased storage, slower writes (INSERT, UPDATE, DELETE), and maintenance overhead.
In PBXware lets suppose queries often filter users by name. Create an index on users.name:
CREATE INDEX idx_users_name ON users (name);
SELECT ext, value FROM users WHERE name = 'Muhamed Salkic';
The index allows MySQL to quickly locate rows with a specific name without scanning the entire table.
One thing to note for PBXware specific table in pbxware.cdr. The CDR (Call Detail Record) table is a system-level table located in the pbxware database, not in tenant-specific databases such as xxx_pbxware. reason being Asterisk does not support the concept of tenants and stores all call data in a single cdr table within the pbxware database. This design will not change, meaning all tenant-related call records are centralized in this table and must be associated with tenants using columns like src or dst linked to tenant-specific identifiers, such as those in the users and tenants tables.
Here is how the pbxware.cdr table looks like:
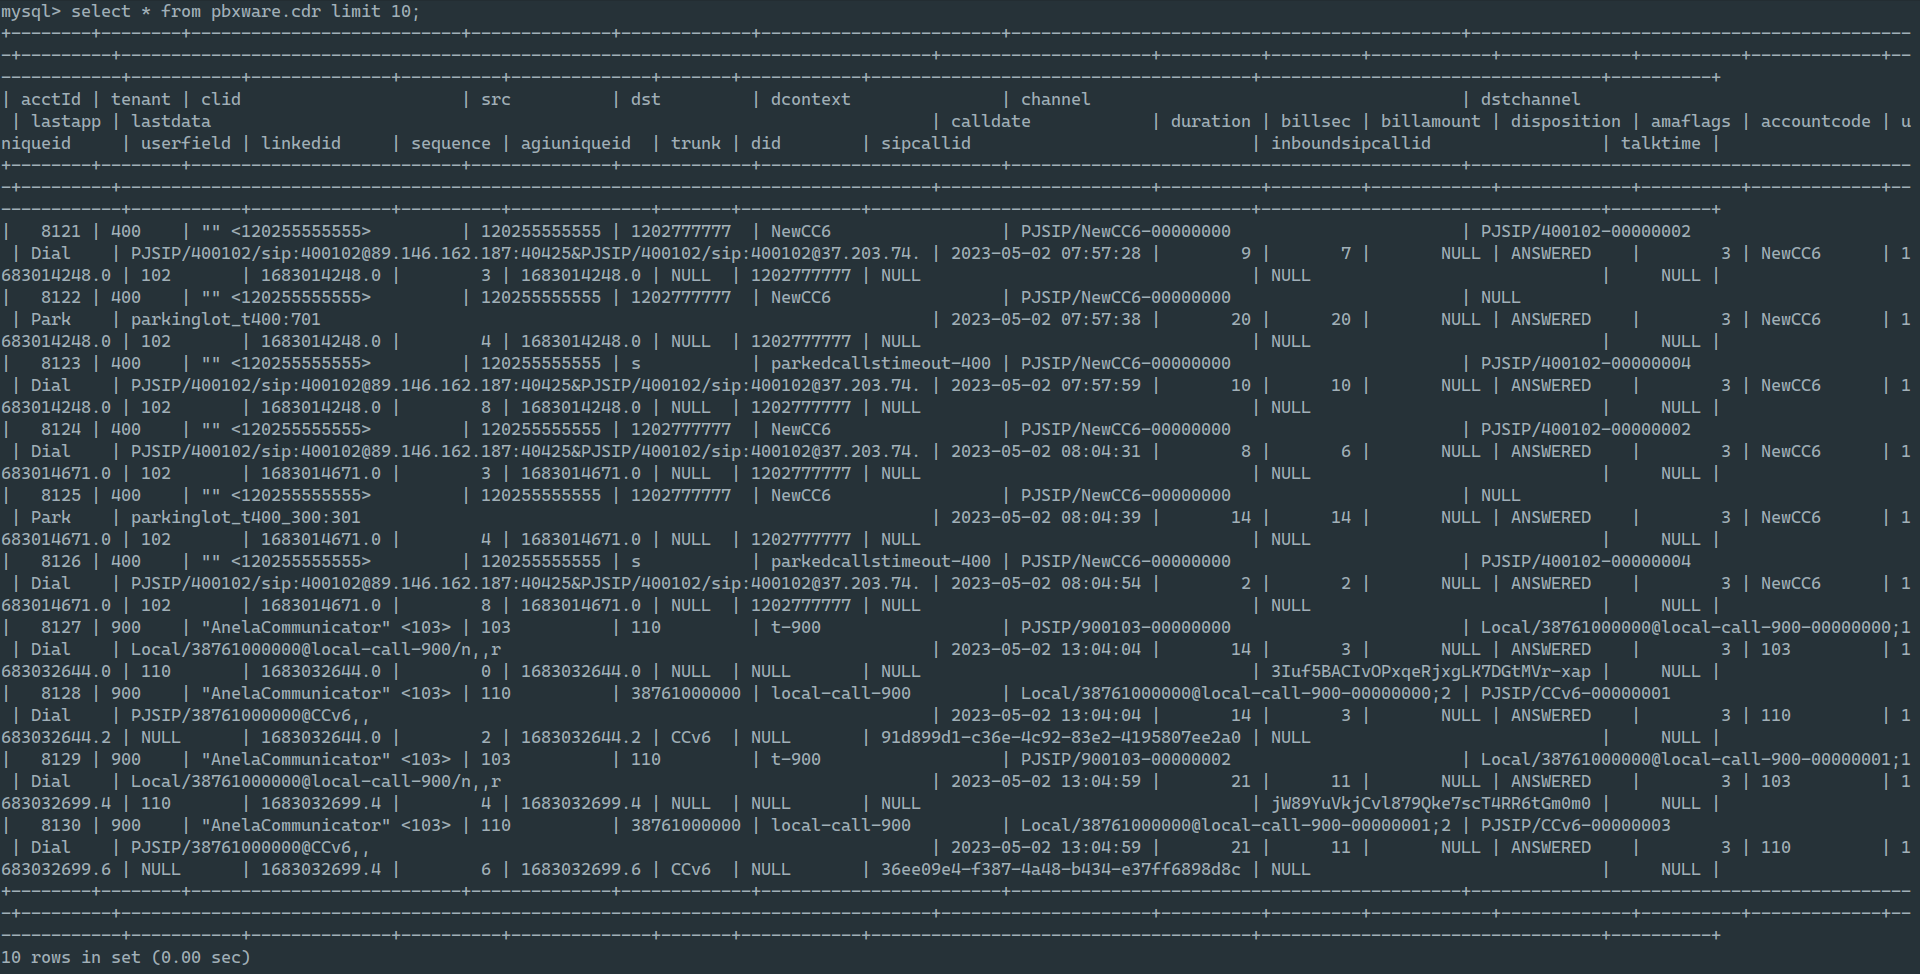
As per the above statement, all the CDRs will be stored here, thus the pbxware_xxx.cdr table would be empty.

As part of the position of System Engineer in Bicom, one of the procedures is troubleshooting MySQL.
This would mostly be done by looking through the logs. The logs of MySQL on a PBXware system can be found at the following path: /opt/pbxware/pw/var/log/mysql/mysqld.err
When interpreting the mysql log files, some of the most common mysql issues on PBXware can be found.
Here are some of them:
mysqld not running
The first problem would be that mysql is not running at all for some reason. If this is the case, we wouldn’t even be able to enter the interface. So let’s check if the service is running on our system by running the command: ps fax | grep -i mysqld

We can see that mysqld is running and now we can use the process number to kill the process manually with the command: kill -9 $numberofproces
If we navigate to GUI, we’ll notice that we can’t even enter it.
To start the service again, just run the following command /opt/pbxware/sh/mysqld
You’ll notice that we can enter the interface now and the service is up and running again. Even though the service is now up and running and everything is working just fine, we still need to check why the crash has happened.
We can check all the log files for mysql on the path opt/pbxware/pw/var/log/mysql and there we would be able to see what happened at the time of the crash. You can investigate the log file to see if there is a message that explains what the cause of the crash was. As we’ve already mentioned, we can have too many connections, table missing, etc… So let's dive into it and check what we can see for each of those problems.
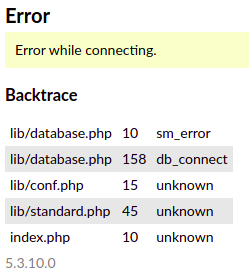
You might get this message even though the service is up again. It happens sometimes if you manually kill the process and start again.In that case just restart pbxware ( /opt/pbxware/sh/pbxware restart) and you should not get the message again, since this time pbxware should stop and start properly.
Too many connections
This problem happens when we have too many simultaneous connections to the database. To have too many connections, we’ll first edit the conf file and set max.connections to 1 instead of the default 128. We’ll find that file on /opt/pbxware/pw/etc/mysql/my.cnf and nano it. Worth mentioning is that this max_connections is not exposed in this configuration file by default, we will have to navigate to the file and add it manually. We set it according to our needs and how big our system is.
By default, the max number of connections is set to 128 but it’s configurable if needed. This problem can happen if you have a lot of RGs with ‘ring all’ strategy, as I’ve already mentioned. It can happen that all the members of the RG are ringing at the same time, which would lead to too many connections.
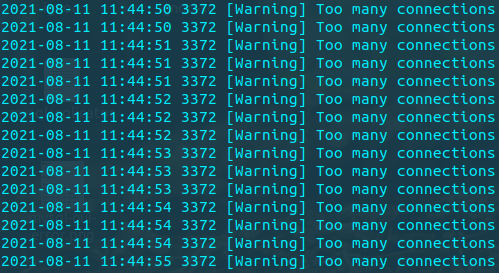
We will navigate to /opt/pbxware/pw/etc/asterisk and we will open one more terminal, where we will tail the mysql error log tail -f /opt/pbxware/pw/var/log/mysqld.error .
In the first terminal we will simulate too many connections by restarting pbxware and then monitor it in the second terminal. Once we restart pbxware, all the extensions,other services,etc are going to make connections to the base to register. As you can see, it is constantly giving us “Too many connections” message. Only one will be able to connect, and the others will lead to this message.
This is a test system, so we had to simulate too many connections by restarting pbxware. If too many connections happen on the real system, we would be able to maybe make some calls and some not. So if you find yourself in a situation where some calls are going through and some are dropping, you should look into this conf.file and check the number set there. You can fix it by editing the conf file and setting the value to the one that suits your needs. Of course, you need to make sure you have enough resources for the number of connections you have set in the configuration file.
innoDB buffer
We can look into the same conf file again and there we’ll see innodb_buffer_pool_size=128M. The issue with this happens after the upgrade. It’s on 128 because it’s the new version, but on the old version it was set to 16MB, which made problems if it hadn't been changed. We will not simulate it now, I just wanted to let you know that this can be an issue as well. You can simply fix this by editing the configuration file and setting the value to 128. You can also set it to the bigger number, depending on how big the system is. But make sure you have enough resources when setting this value as well.
Sent_faxes table missing
To show you how to solve the next issue - missing table issue, we will move to mysql. To do so and to be able to find databases and tables in mysql, we will run the command /opt/pbxware/sh/mysql where we can list tables, run different commands, etc..
We will show databases;
use database $specifywhichone;
show tables;
We can see the table sent_faxes. Then we’ll do
explain sent_faxes;
When this table is missing, we need to create the identical one. I will provide the command for you, so you wouldn’t have to memorize it. You can just change it and use it.
GUI - fax - sent faxes (we can see that we can open this page)
If we go to the terminal and drop the table
drop table sent_faxes;
Then we navigate to the tenant in question and we can see this message:
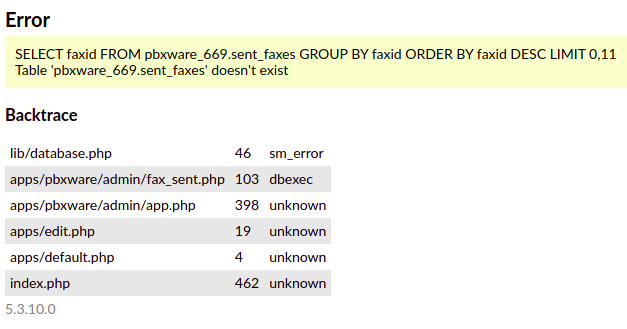
To create the table again, we need to navigate to /opt/pbxware/sh/mysql , use pbxware_tenantinquestion and use the command:
"CREATE TABLE pbxware_669.sent_faxes (faxid varchar(100) PRIMARY KEY, faxsource varchar(100), faxdestination varchar(100), faxsentpages int(11), faxtotalpages int(11), faxstatus varchar(20), faxdate varchar(100), faxfile varchar(200));"
Now when we navigate back to GUI, we’ll see that the table is not missing and everything is fine again.
One of the biggest issues that can occur with MySQL in PBXware is database corruption.
Database corruption can be fixed with the procedure of database recovery.
This would be the step by step procedure for the database recovery:
1) Stop all PBXware services and make sure everything is stopped
/opt/pbxware/sh/stop/opt/httpd/sh/stop
2) Create a backup of current MySQL data before doing anything:
cd /opt/pbxware/pw/var/lib/cp -a mysql mysql.bak
3) In order to force InnoDB recovery you will have to enter an additional config line in my.cnf file. This line goes into [mysqld] context:
nano /opt/pbxware/pw/etc/mysql/my.cnfInsert -> innodb_force_recovery = 1
4) Start mysqld:
/opt/pbxware/sh/mysqld5) Check if MySQL daemon started without any issues. To do this check MySQL log file:
tail -n 30 /opt/pbxware/pw/var/log/mysql/mysqld.err (check if started properly)6) Initiate MySQL data dump:
cd /opt/pbxwaresh/mysqldump --all-databases --force > SqlDump.sql
If the initial dump fails and MySQL crashes, return to step 3) and increase innodb_force_recovery to 2 (this can go up to 6, ).
7) Once the dump is complete (mysqld did not crash and there were no serious errors) stop MySQL:
/opt/pbxware/sh/mysqladmin shutdown8) Remove everything from pw/var/lib/mysql/ leaving only MySQL folder and files within
cd /opt/pbxware/pw/var/lib/mysql/9) Edit my.cnf file and remove or comment out innodb_force_recovery conf line
10) Start mysqld and check if it's properly started (see 4. and 5.)
11) Initiate data import:
cd /opt/pbxwaresh/mysql < SqlDump.sql
NOTE: In case the import is stopped due to duplicate entry error (i.e. - ERROR 1062 (23000) at line 344361: Duplicate entry '53527420' for key 'PRIMARY') the only way to complete the import will be to use --force switch.
Please be aware that this will skip all duplicate entries which will be omitted from the database, however, this is the only way to complete the process.
sh/mysql --force < SqlDump.sql12) Wait for the import to complete. It may take some time depending on the amount of data and system speed. One way to monitor progress:
cd /opt/pbxware/pw/var/lib/watch -n 15 "du -sh mysql*"
13) Shutdown mysqld once the import is complete ( see 7.)
14) Start all services
/opt/httpd/sh/start/opt/pbxware/sh/start
If during dump or reimport you get MySQL complaints for some tables from MySQL folder like:
ERROR 1146 (42S02) at line 1896: Table 'mysql.slave_master_info' doesn't exist
ERROR 1146 (42S02) at line 1897: Table 'mysql.slave_master_info' doesn't exist
ERROR 1146 (42S02) at line 1898: Table 'mysql.slave_worker_info' doesn't exist
ERROR 1146 (42S02) at line 1899: Table 'mysql.slave_relay_log_info' doesn't exist
ERROR 1146 (42S02) at line 1903: Table 'mysql.innodb_table_stats' doesn't exist
ERROR 1146 (42S02) at line 1907: Table 'mysql.innodb_index_stats' doesn't exist
You need to remove all .ibd files along with corresponding .frm files. .MYD files and their corresponding .frm files should not be touched. The files mentioned are in the MySQL folder.
In this particular case slave_* , innodb_* , ibdata , iblog* were removed along with the performance_schema folder which I believe is not present on v4 systems.
After removing the above, start MySQL and perform mysql_upgrade from chroot like this:
chroot /opt/pbxware/pwmysql_upgrade -s
After this completes with no errors, stop MySQL and start it again to make sure there are no errors or crashes.
If there are no errors in the MySQL log and if the service does not crash start re-importing your data from the dump file (step 11.)
In case you notice errors like below in the MySQL log file,
2021-07-21 23:50:00 731 [Note] InnoDB: Database was not shutdown normally!2021-07-21 23:50:00 731 [Note] InnoDB: Starting crash recovery.2021-07-21 23:50:00 731 [Note] InnoDB: Reading tablespace information from the .ibd files...2021-07-21 23:50:24 731 [ERROR] InnoDB: Attempted to open a previously opened tablespace. Previous tablespace mysql/slave_relay_log_info uses space ID: 3 at filepath: ./mysql/slave_relay_log_info.ibd. Cannot open tablespace admin_site/200_pbxware_auto_ranges_numbers which uses space ID: 3 at filepath: ./admin_site/200_pbxware_auto_ranges_numbers.ibd2021-07-21 23:50:24 7fe618f65f40 InnoDB: Operating system error number 2 in a file operation.InnoDB: The error means the system cannot find the path specified.InnoDB: If you are installing InnoDB, remember that you must createInnoDB: directories yourself, InnoDB does not create them.InnoDB: Error: could not open single-table tablespace file ./admin_site/200_pbxware_auto_ranges_numbers.ibdInnoDB: We do not continue the crash recovery, because the table may becomeInnoDB: corrupt if we cannot apply the log records in theInnoDB log to it.InnoDB: To fix the problem and start mysqld:InnoDB: 1) If there is a permission problem in the file and mysqld cannotInnoDB: open the file, you should modify the permissions.InnoDB: 2) If the table is not needed, or you can restore it from a backup,InnoDB: then you can remove the .ibd file, andInnoDB will do a normalInnoDB: crash recovery and ignore that table.InnoDB: 3) If the file system or the disk is broken, and you cannot removeInnoDB: the .ibd file, you can set innodb_force_recovery > 0 in my.cnfInnoDB: and force InnoDB to continue crash recovery here.
You will need to edit MySQL configuration file as per below and start MySQL again,
nano /opt/pbxware/pw/etc/mysql/my.cnfinto [mysqld] context if it does not exist add,innodb_force_recovery = 2If it exists simply put value to 2