TABLE OF CONTENTS
HOWTO LDAP/Central directory
In PBXware, the Central Phone Book is implemented through the 'LDAP' option, Lightweight Directory Access Protocol. At this time, LDAP is a new feature available from PBXware v6 and it is available for Yealink, Polycom, and Cisco phones.
NOTE: Phones from other manufacturers will ignore this option and use the directory as before.
In order for the Central directory to work, please do the following steps.

Navigate to 'Master Tenant' → 'Settings' → select a desired 'Tenant'
- Enable LDAP
- Enables/Disables the LDAP Central Phone Book feature
- Password
- Password is sent to the phones with the auto-provisioning configuration and used to authenticate the phone with PBXware when searching/fetching contacts. Set any password
- Include System Extensions
- Select whether to include System Extensions
By default, when LDAP is enabled, the phones are served only the contacts defined in the Central Phone Book. If this option is set to 'Yes', then the contact list will include System Extensions as well.
NOTE: The phone must be auto-provisioned in order to use LDAP.
Central Phone Book for a Tenant can be uploaded in the CSV format.

Navigate to a desired 'Tenant' → 'Settings' → 'Central Phone Book'.

General
- First Name
- Contact's first name (mandatory field)
- Middle Name
- Contact's middle name
- Last Name
- Contact's last name
- Contact's email address
- Company
- Contact's company
Numbers
- Type
- Number type
- NOTE: Number type is case Insensitive which means 'Work', 'WORK', 'wOrK' is also acceptable.
- Number
- Contact's phone number
- CSV Upload
- The 'CSV Upload' button will be used to upload a predefined list of contacts to the contacts list. Please refer to the example of a CSV file with 5 contacts:
1 Chevy,,Yesipov,cyesipov0@example.com,Jacobi and Sons,mobile:50011,work:600111 2 Jeanine,,Tiddeman,jtiddeman1@ihg.com,Walsh Group,mobile:50012,work:600112 3 Erasmus,,Curlis,ecurlis2@sbwire.com,Nolan-Kris,mobile:50013,work:600113 4 Caresa,,Bremmell,cbremmell3@php.net,Mayert Inc,mobile:50014,work:600114 5 Romy,,Hedling,rhedling4@latimes.com,"Ankunding, Weissnat",mobile:50015,work:600115
When uploading a CSV file, the following warning message will appear:
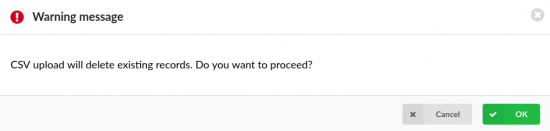
NOTE: Upon uploading a new CSV file, all existing contacts on the system will be deleted, which ensures that a user's contact list stays up-to-date.
NOTE: If a value (first_name, last_name etc.) has a comma, it has to be put under quotes.
NOTE: If the number type is not 'work', 'mobile', 'home', or 'fax', then that number will be skipped.
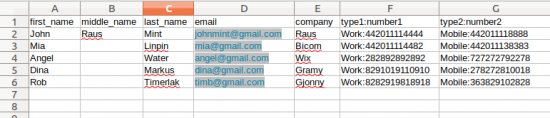
As shown in the example above, the 5th contact with a Company name looks like this "Ankunding,Weissnat".
In the Excel sheet format:
After uploading:

- CSV Download
- Clicking the 'CSV Download' button will download all the global/personal contacts as a CSV file.
- Download CSV Template
- Clicking the 'Download CSV Template' button will download a CSV template that can be used to create a CSV with contacts and upload it instead of adding contacts one by one.
Upon downloading the template, an Excel sheet with headers and empty columns will appear. Please refer to the screenshot.

NOTE: In order for Central Phone Book to work properly, headers can not be deleted and the data below should be entered properly.
Central Phone Book can also be set on the Extension Level. It represents a Personal Phone Book.
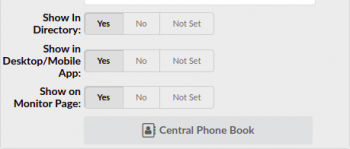
Navigate to 'Extension' → 'Advanced' → 'General' → 'Central Phone Book'
- Contacts added in this Central Phone Book are visible only to the Extension where this is set.
- Contacts in Central Phone Book on the Extension level can be added through OSC as well.
- Log into the Online Self Care with an e-mail, user password, and PIN for the Extension.
- Users can manage the Directory under the 'Phone Book' section.


By default, the maximum number of Contacts in LDAP is 50, and the maximum number of connected devices is 128.
The LDAP configuration file can be found on the path:
/opt/pbxware/pw/etc/ldap/ldap_directory.ini
NOTE: By request, this number can be increased, but it is not recommended to go above 150 max. for Contacts and 256 max. for Concurrent.
Access LDAP when transferring a call

To be able to access LDAP when transferring a call, enable ‘Directory’ and ‘Search Source List in Dialing’ in the phone GUI.
- For example, for a Yealink phone:
- 1. Enter the phone's IP in the browser (E.g. 10.1.0.202)
- 2. Navigate to 'Directory' → 'Settings' → 'Directory' → 'Directory: LDAP → Enable and 'Search Source List in Dialing: LDAP' → Enable