HOWTO Set Up Hosted SMS with Telnyx

Step by Step Guide
Number porting refers to transferring the existing service from one provider to another.
- Hosted SMS allows numbers that are on a different voice provider to use Telnyx for SMS without affecting the voice functionality.
- It is possible to transfer only SMS portion to Telnyx while the voice operations remain with their other provider.
These are the steps that should be taken:
| List of Actions | |
|---|---|
| 1. | Obtain Authorization Documentation |
| 2. | Host the Number |
| Obtain Authorization Documentation |
|---|

In order for Hosted SMS to be utilized successfully, a user needs to provide the following two documents:
- 1. A Letter of Authority (LOA) that authorizes Telnyx as a Service Registrar to route SMS on the specified number(s).
- 2. A bill from a current provider.
NOTE Both documents should contain valid Authorized Name and Address that have to match.
To download LOA and gain access to the document, please refer to this link
| Host the Number |
|---|


To set up Hosted numbers, please do the following:
- 1. Navigate to 'Messaging' on the side menu on the Telnyx portal.
- 2. Click the 'Hosted SMS' tab.
- 3. Users will be prompted to a different window where they can configure details regarding Hosted numbers.
Managing Existing Hosted Numbers

The 'Hosted SMS' page contains information regarding Status, Numbers, and Messaging Profile.
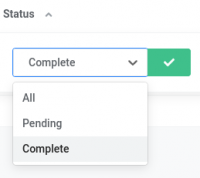
- Status
- Displays the status of numbers
NOTE: Users can select one of the three Statuses from the drop-down menu and have their data filtered accordingly.

- Number
- Displays the Hosted numbers
NOTE: Users can enter specific numbers and have their data filtered accordingly.

- Messaging Profile
- Displays a Messaging profile that the number is added to
Besides selecting data and filtering results, users may also edit the existing configuration.
 Click the 'Edit' icon to make any changes, if necessary.
Adding a New Order
To add a new order, users have to click the 'Add New Order' button, after which they will be redirected to a different page where they can proceed to enter all valid and necessary data in order to successfully set up Hosted SMS.


For configuration to be set up correctly, it is a requirement to populate the following two fields:
- Numbers
- Enter one or more numbers in the E.164 format
- NOTE: If entering more than one number, they should be separated by a semicolon, colon, or carriage return.
- NOTE: In case the entered number does not have the required format, the following warning message will appear saying "'1-xxxxxxxxxx' must be in +E.164 format.". Please refer to the screenshot.
- Messaging Profile
- Select a desired Messaging profile
Finalizing a New Order
Once the numbers are entered and the Messaging profile is selected, users will be prompted to a different page where they can check the details about the Messaging profile and get the Order ID. Also, on this page, they can upload authorization documentation - LOA and bill files.

- LOA (only pdf files)
- Drag and drop a file or click to select a file
- Bill (only pdf files)
- Drag and drop a file or click to select a file

NOTE: Please note that both files need to be in PDF format.
As it is suggested on the Telnyx portal, the waiting time can take up to 24 hours before the number goes active if the documents and the numbers are approved for hosting.